
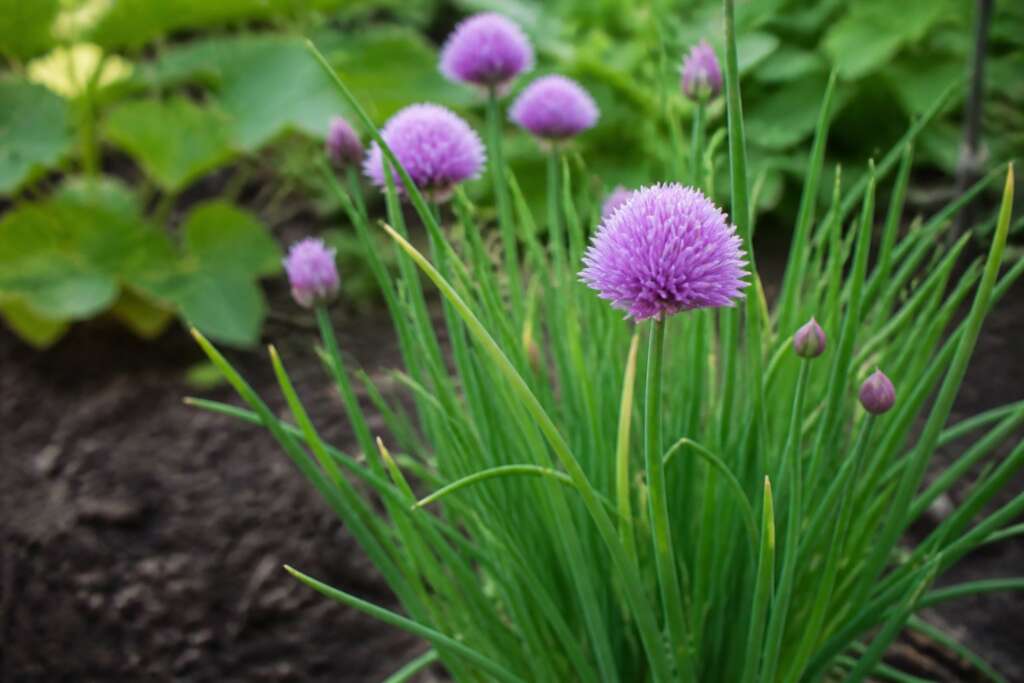
Chives (Allium schoenoprasum) are a perennial onion-family herb prized for their slender hollow leaves, mild onion flavor, and cheerful purple flowers — all of which are edible. They grow as a clumping, grass-like mound that regrows reliably year after year once established, making seed starting a one-time investment that pays off for years in the herb garden or container. Germination from seed takes longer than some herbs and requires warmth and light, but the reward is a hardy, productive plant that thrives with minimal care.
Quick How-to
Start chive seeds indoors 6 to 8 weeks before the last expected frost, or direct sow into warm garden soil in spring after frost risk passes. Sow seeds about 1/4 inch deep, keep the soil warm (around 65 to 70 F), and provide good light from the moment sprouts appear. Expect germination in 10 to 14 days. Chives grow slowly at first — thin to proper spacing, and plan to begin harvesting leaves once plants are at least 6 inches tall and well established, usually by late summer of the first season.
Quick Guide
| Fact | Recommendation |
|---|---|
| Best method | Start indoors 6 to 8 weeks before last frost; direct sow once soil warms |
| Sowing depth | About 1/4 inch |
| Germination temperature | 65 to 70 F for steady emergence |
| Days to germination | About 10 to 14 days |
| Light for germination | Cover seed; strong light needed immediately after sprouting |
| Spacing | Thin to about 6 inches apart (clumps); or 2 to 4 inches between individual plants |
| Sun | Full sun to light partial shade |
| Water | Evenly moist but well-drained; do not let plants sit in standing water |
| Harvest timing | Begin cutting once plants reach 6 inches; cut 2 to 3 inches above the base |
| Plant size | 12 to 18 inches tall when mature and blooming |
Before You Sow
Chives are slower to establish from seed than from divisions or transplants, so starting early pays off. Choose a growing spot that gets 6 or more hours of sun per day and has decent drainage. Chives tolerate average soil but produce more growth in soil that has a modest amount of organic matter worked in. Avoid heavily amended beds that push excessive lush growth, which can attract aphids.
If starting in containers, use a pot at least 6 inches deep and wide with drainage holes. Chives grow well in containers and on windowsills with strong, direct light.
Indoor Starting
Sow chive seeds about 1/4 inch deep in a moist seed-starting mix. Use clean cells or a small tray. Cover the seeds evenly and press lightly for good soil contact. Keep the surface consistently moist — not saturated — and maintain warmth at 65 to 70 F. A humidity dome helps retain moisture during germination but should be removed as soon as sprouts appear to improve airflow.
Because chives germinate more slowly than many kitchen herbs, patience is necessary. It is common to see nothing for 10 to 12 days, then a flush of thin, grass-like seedlings. Move the tray into strong light immediately once seedlings emerge. Thin crowded seedlings or allow small clumps of 4 to 6 seedlings to grow together and transplant as a unit — this is a common practice and produces a quicker-maturing clump than single-seeded transplants.
Direct Sowing
Once soil has warmed to at least 60 F in spring, chives can be direct sown. Prepare a smooth, fine seedbed. Sow seeds thinly in shallow rows or clusters, cover about 1/4 inch deep with fine soil, and press gently. Water with a gentle spray to avoid washing seed away. Keep the seedbed evenly moist until germination, which may take 10 to 14 days or slightly longer in cooler soil.
Thin seedlings to approximately 6 inches apart once they are 3 to 4 inches tall. Crowded direct-sown chives will grow but may produce weaker, thinner leaves.
Transplanting
Harden off indoor-started chive seedlings or clumps for 5 to 7 days before transplanting outside. Give them increasingly longer outdoor exposure in a sheltered spot before setting them in their final bed or container. Plant at the same depth as the cell. Water well after transplanting and keep the root zone moist for the first week.
Soil, Sun, and Water
Chives do best in full sun to light partial shade. Shade beyond a few hours per day reduces leaf production and can make plants lanky. Soil should be well-drained and moderately fertile — a modest amount of compost is sufficient. Very heavy or waterlogged soil invites root problems and reduces vigor in this perennial herb.
Water chives when the top inch of soil becomes dry. They are relatively drought tolerant once established but grow more productively and produce more tender leaves with consistent moisture. Avoid wetting the foliage late in the day; good airflow around the clumps keeps the plants healthy.
In fall, perennial chive clumps die back to the ground and return reliably in spring. In USDA zones 3 through 9, established chive plants overwinter without protection in most conditions.
Hydroponic Growing
Chives are easiest to grow hydroponically as small clumps rather than single plants. Sow several seeds in each inert plug, keep the plug evenly damp, and transfer once a web of roots reaches the outside. NFT, deep-water culture, and compact passive systems can all work. Position the plug so the crown stays above the solution and individual shoots are not buried.
Use a complete herb or leafy-green nutrient at a moderate EC, roughly 1.2 to 1.8 mS/cm, and pH about 5.8 to 6.2. Chives do not need the stronger feeding used for fruiting crops. Keep the reservoir shaded and oxygenated, top up with water as needed, and refresh the solution periodically.
Give each clump about 4 to 6 inches and bright overhead light. Cut leaves 1 to 2 inches above the crown rather than shaving the plant to the plug. Rotate or divide older clumps when the center becomes dense and yellow; fresh outer divisions resume growth more evenly.
Floppy pale leaves need stronger light. Yellowing from the base can come from an overcrowded crown, high EC, or roots sitting in stagnant warm water. Brown tips often reflect salt buildup or dry air; verify EC, refresh the solution, and avoid letting water levels swing sharply.
Top Mistakes
- Sowing too deep: Chive seeds are small and should not be buried deeper than 1/4 inch. Deeper sowing delays emergence and reduces stand density. Shallow, even sowing with consistent surface moisture gives the best results.
- Harvesting too soon in the first season: Chives from seed establish slowly. Cutting leaves heavily before the plant is well rooted can set it back significantly. Wait until plants are at least 6 inches tall and showing strong clump growth before your first harvest.
- Letting plants go to flower repeatedly without deadheading: The purple flowers are edible and attractive, but allowing seeds to scatter can create weedy seedlings in adjacent beds. Deadhead spent flowers to keep clumps tidy and encourage continued leaf production.
- Dividing first-year seed-grown plants too early: Chive clumps thicken and become more productive over 2 to 3 years. Dividing too soon in the first or second season reduces productivity rather than increasing it. Allow plants to fill out before dividing.
- Planting in poorly drained soil: Standing water around chive roots, especially during cold periods, encourages rot. Make sure the bed or container drains freely.
Troubleshooting by Symptom
| Symptom | Likely causes | What to do next |
|---|---|---|
| No sprouts after 14 to 18 days | Soil too cool, seeds buried too deeply, surface dried out, or seeds too old | Check soil temperature, confirm 1/4-inch sowing depth, keep surface evenly moist, and resow in fresh warm mix if needed |
| Seedlings are very thin and pale | Insufficient light after germination, or overly warm and dark conditions | Move into strong overhead light immediately; thin crowded seedlings to improve airflow |
| Leaves yellow and droop at base | Overwatering, poor drainage, or root rot beginning | Improve drainage, reduce watering frequency, and inspect roots; dark or mushy roots indicate a drainage or moisture problem |
| Plants bloom but produce few leaves | Normal behavior when flowering heavily; heat stress can also redirect energy | Cut flower stems back promptly after bloom to redirect plant energy to leaf production |
| Aphid clusters on foliage | Common on soft growth, especially in warm, still conditions | Blast foliage with a strong water spray; improve airflow around clumps; check nearby allium family plants |
| Leaves become dry and straw-colored in summer | Normal summer dormancy in hot climates, or drought stress | Cut back to 2 to 3 inches, water well, and the plant will typically regrow in cooler fall conditions |
Harvest and Use
Begin harvesting chive leaves once plants are well established and at least 6 inches tall. Use clean scissors to cut leaves 2 to 3 inches above the soil line — never cut to the ground until you are deliberately preparing the clump for fall. Cutting in this way stimulates new growth. Leave enough foliage so the plant can continue photosynthesizing and building roots.
Established chive clumps can typically be harvested 3 to 4 times per growing season. After bloom, cut the whole clump back by half to encourage a fresh flush of tender leaves.
Chive flowers are edible with a mild onion flavor and make attractive additions to salads and garnishes. Harvest flowers when fully open, before they begin to fade. If you are using chives for cooking, the thin tubular leaves are most tender when harvested before flowering begins.
Seed Saving
Chives are open-pollinated and will set mature seed in the spent flower heads. To save seed, allow selected flower heads to dry completely on the plant. The small black seeds fall readily once the head browns and dries. Collect seed heads into a paper bag on a dry day and complete drying indoors before storing. Label with the variety name and harvest year.
Note that chives can cross-pollinate with other Allium schoenoprasum plants growing nearby, though they will not cross with garlic chives (Allium tuberosum) in a meaningful way for seed saving purposes. Keep seed crops reasonably separated for best true-to-type results.
Storing Leftover Seed
Keep unused Chives seed in its labeled packet inside a sealed container in a cool, dry, dark indoor location. Avoid garages, sheds, greenhouses, and sunny windowsills, where temperature and humidity swing sharply. Label home-saved seed with the variety and harvest year before storing it.
FAQ
How long does it take for chives to produce harvestable leaves from seed?
Plan on roughly 60 to 90 days from germination to the first modest harvest in the first season. Chives establish slowly from seed compared to divisions. By the second year, the clump will be significantly more productive and can be harvested repeatedly throughout the season.
Can I grow chives indoors year-round?
Yes, chives grow well indoors in a sunny south-facing window or under a grow light providing 12 to 14 hours of bright light daily. Indoor plants may require slightly more frequent watering than outdoor beds. Reduce fertilizing in winter when growth naturally slows.
Are chive flowers edible?
Yes. The purple globe-shaped flowers have a mild onion flavor and can be used fresh in salads, as garnishes, or infused into vinegar. Harvest them when fully open and before they begin to brown.
Do chives come back every year?
Yes. Chives are perennial in USDA zones 3 through 9 and die back to the ground in winter in cold climates, then return reliably in spring. The clumps expand over several years and can be divided every 3 to 4 years to rejuvenate them.
Can I grow chives in a container?
Chives grow well in containers with at least 6 inches of depth and good drainage. Use a quality potting mix and place the container in a full-sun location. Container chives may need slightly more frequent watering than in-ground plants and benefit from a light feeding of balanced fertilizer in spring.