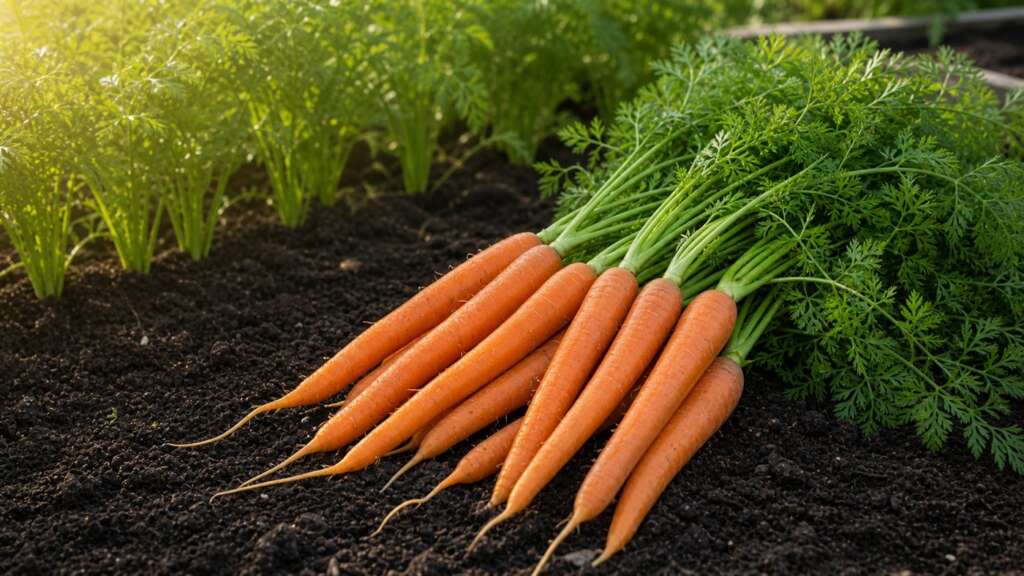
Tendersweet is a long, slender, deep-orange heirloom carrot grown for sweet flavor, smooth roots, and almost coreless eating quality. Like other carrots, it is a cool-season crop that should be direct sown where it will mature. Most early problems trace back to one of four things: tough or rocky soil, sowing too deep, letting the seed surface dry, or skipping the thinning step.
Quick How-to
Direct sow Tendersweet Carrot in cool spring or late-summer soil that has been loosened deeply and cleared of stones and clods. Cover seed lightly, about 1/4 inch, and keep the surface evenly moist until the row emerges. Expect germination in roughly 10 to 21 days, with steadier results when soil sits around 55 to 75 F. Thin early so each plant has room to size up; crowded carrots tend to stay small, twist, or refuse to fill out. Harvest when shoulders show good orange color and reach usable diameter; verify final length and days-to-harvest on the packet.
Quick Guide
| Fact | Recommendation |
|---|---|
| Best method | Direct sow only; do not transplant |
| Sowing depth | About 1/4 inch, lightly covered |
| Germination temperature | About 55 to 75 F is most reliable; broader range 45 to 85 F |
| Days to germination | About 10 to 21 days; cool soil is slower but more even |
| Light for germination | Cover lightly rather than leaving exposed; keep the row consistently moist |
| Spacing | Thin to about 2 to 3 inches between plants; rows 12 to 18 inches apart |
| Sun | Full sun; light afternoon shade is acceptable in hot climates |
| Water | Steady, even moisture; deep watering as roots size up |
| Harvest | Often about 70 to 75 days from sowing; verify final packet timing |
| Plant size | Long, slender taproot; verify mature length on the packet |
Before You Sow
Soil prep is the single biggest factor with a long carrot like Tendersweet. The root grows straight down into whatever it finds, and any rock, clod, or compacted layer can stop or twist it. Work the bed at least as deep as the expected mature root, ideally a little deeper, and break up clods until the texture feels uniform and crumbly. Rake the surface smooth so seed can be placed at an even depth.
Skip fresh manure and heavy nitrogen feeding before sowing. Carrots respond to rich nitrogen by pushing leafy tops and forked, hairy, or split roots rather than the clean taproot you are after. Well-finished compost worked in ahead of time is fine; uncomposted amendments are not.
If your native ground is rocky or heavy clay, consider building a dedicated carrot bed: a raised frame filled with screened soil and compost, or a deep container. A bed that looks “too easy” by clay-soil standards is usually about right for long carrots.
Water the bed lightly before sowing so the seed does not wash down into low spots when you irrigate after planting. Label the row at the time of sowing. Carrot seedlings are thin, slow, and easy to mistake for weeds in the first two weeks.
Direct Sowing
Open a shallow furrow, about 1/4 inch deep, and sow seed thinly along the row. Carrot seed is small and pelleted versions are easier to space if you find unpelleted seed hard to handle. Cover with a thin layer of fine soil, sifted compost, or vermiculite. Vermiculite is especially helpful because it holds moisture and resists crusting, which is one of the most common reasons carrot rows fail to emerge.
Press the row gently for soil contact and water with a fine spray rather than a hard stream. From this point until sprouts appear, the goal is steady surface moisture. The seed needs to stay damp continuously through germination, which may take two to three weeks in cool soil. A light board, burlap strip, or shade cloth laid over the row can buy you time between waterings, but check daily and remove the cover at the first sign of emergence.
For a continuous supply, sow small successions every two to three weeks during the cool window rather than putting in one large planting all at once.
Why Indoor Starting Is Not Recommended
Carrots form a single taproot very early. Disturbing that root during transplanting usually causes forking, stubby growth, or stalled development. Even gentle handling of seedling roots tends to show up later in the harvest as twisted or split carrots. Direct sowing into the final bed is not just easier; for this crop it produces noticeably better roots.
If you only have container space, sow directly into the container where the carrots will mature rather than starting in cells and moving them.
Thinning and Spacing
Thinning is where most home gardeners lose carrot yield. Seedlings look small and harmless when they first emerge, and it feels wasteful to pull healthy plants. Skipping this step is the most reliable way to get a row of pencil-thin carrots.
Begin thinning when seedlings are 1 to 2 inches tall, then thin again a couple of weeks later. Aim for final spacing of about 2 to 3 inches between plants, with rows 12 to 18 inches apart. Pinch or snip extra seedlings at the soil line rather than yanking, which can disturb the roots of the keepers. Later thinnings are edible as baby carrots, so the work is not wasted.
Water lightly after each thinning to resettle the soil around the remaining plants.
Soil, Sun, and Water
Carrots want full sun and steady moisture. Light afternoon shade is fine, especially in hot regions, but heavy shade leads to thin tops and underweight roots. Soil should drain freely yet hold enough moisture that the bed never bakes dry.
After germination, shift watering from light frequent sprinkles to deeper, less frequent soakings. Shallow watering encourages shallow rooting; deeper watering pulls the taproot down and helps roots fill out evenly. A light mulch once seedlings are a few inches tall helps stabilize moisture and keeps the shoulders cool. If shoulders push above the soil line as roots grow, cover them with a little soil or mulch to prevent the tops from turning green or bitter.
Avoid heavy mid-season fertilizing. If the bed was prepared with compost, additional feeding is usually unnecessary and can degrade root quality.
Top Mistakes
- Sowing into rocky or compacted soil. A long carrot meets every obstacle in the soil. Stones, clods, and hardpans cause forking, stunting, and twisting that no amount of later care can fix.
- Letting the seed row dry out. Carrot germination is slow, and the surface only needs to dry once during those weeks for the row to fail. Mulching, vermiculite cover, or a shade strip can help hold moisture between waterings.
- Burying seed too deep. Carrot seed is small and has limited energy reserves. A heavy cover or a soil crust can stop seedlings before they reach light.
- Skipping or delaying thinning. Crowded carrots stay small, twist around each other, or fail to size up at all. Thin on time, even if it feels aggressive.
- Adding fresh manure or excess nitrogen. Both push leafy tops and forked or hairy roots. Feed the soil with finished compost ahead of sowing, not the growing plants.
- Sowing into peak summer heat. Hot soil dries fast and germinates carrots unevenly. Spring and late-summer-into-fall sowings are usually more forgiving.
Troubleshooting by Symptom
| Symptom | Likely causes | What to do next |
|---|---|---|
| No sprouts after 21 days | Surface dried during germination, soil crusted, seed buried too deep, soil too hot, or seed past its prime | Resow shallowly, cover with vermiculite or sifted compost, keep the row consistently damp, and shade the surface during heat |
| Patchy, uneven row | Seed washed by hard watering, inconsistent depth, or dry pockets along the row | Water with a fine spray, sow a thin even line, and fill bare spots with a quick resow |
| Forked or split roots | Rocks, clods, fresh manure, heavy clay, or root disturbance from transplanting or hoeing | Deepen and screen the bed before next sowing, avoid raw manure, and weed by hand near established plants |
| Hairy or whiskered roots | Excess nitrogen, inconsistent moisture, or heat stress | Skip mid-season feeding, mulch to stabilize moisture, and aim for cooler growing windows |
| Short or stubby roots | Compacted subsoil, crowded plants, drought, or harvesting too early | Loosen the bed deeper next time, thin earlier, water deeply, and pull a test root before judging the whole row |
| Pale, weak tops | Too much shade, waterlogged soil, or poor germination conditions still affecting plants | Move to a sunnier spot for the next sowing and check drainage |
| Green shoulders or bitter flavor | Tops exposed to sun, heat stress, or over-mature roots | Hill a little soil or mulch over exposed shoulders and harvest before quality slips in late heat |
| Cracked or split roots | Sudden heavy water after a dry stretch, or leaving roots in the ground past peak | Keep moisture more even and harvest on time |
Container and Small-Space Notes
Tendersweet’s length makes container choice important. Use a container at least 12 inches deep, ideally deeper, to give the root room to extend. Wider tubs or fabric pots work well because they let you sow multiple plants while still allowing for proper spacing after thinning.
Container mixes dry faster than garden beds, especially during germination. Plan to water lightly more than once a day during the first weeks if surfaces dry quickly, and consider a thin vermiculite cover over the seed line to hold moisture. Once seedlings are established, shift to deeper, less frequent watering as you would in the garden.
If you only have a shallow container, choose a shorter carrot type rather than fighting the depth. Long varieties like Tendersweet reward the gardener who can give them room.
Timing and Climate Notes
Treat Tendersweet as a cool-window crop. In most regions, that means an early spring sowing once the soil can be worked and a second sowing in late summer for a fall harvest. Fall-grown carrots are often the sweetest of the year because cool weather concentrates sugars in the root.
In hot-summer regions, avoid sowing into peak heat. Either finish the spring crop early or wait until late summer when nights begin to cool. Pelleted seed, light shade cloth, and consistent moisture all help carry a row through marginal weather, but the simpler fix is usually to choose a more favorable sowing date.
In mild-winter regions, fall and winter sowings can extend the harvest window into the cool months. Verify local timing with your regional extension service.
Harvest and Storage
Begin checking roots when you see good shoulder color and the diameter looks about right for the variety. Pull a single test root before harvesting the row; this is the most reliable way to judge what is happening underground. Loosen the soil with a fork before pulling so roots come up cleanly rather than snapping off in the bed.
Twist off or cut the tops promptly after harvest. Leaving the green tops attached pulls moisture out of the root and softens it within days. Brush off soil rather than washing if you plan to store the roots; unwashed carrots keep longer. Refrigerate in a sealed container or perforated bag with a damp cloth, or store in damp sand or sawdust in a cool root cellar for longer holding.
Tendersweet’s eating quality is at its peak when harvested at moderate size rather than left to grow oversized. Older roots can develop a stronger core and lose tenderness.
Seed Saving
Carrots are biennial, so seed saving is a two-year project. Plants must overwinter in the ground or in storage and be replanted to flower in their second year. Carrots also cross readily with wild carrot (Queen Anne’s lace) and with other carrot varieties grown nearby, so isolating selected plants is necessary for true-to-type seed. For most home gardeners, fresh purchased seed is the simpler path; seed saving is best left to gardeners willing to manage isolation and overwintering carefully.
Seed Viability and Storage
A conservative planning range for carrot seed is about 2 to 3 years when stored cool, dry, dark, and sealed. Older seed often still sprouts, but germination rates drop and rows become patchier. If seed has been kept in warm or humid conditions, run a small germination test on a damp paper towel before committing it to a full bed.
FAQ
Why did my carrots fork or split?
Forking is almost always a soil issue. Rocks, clods, hard layers, fresh manure, or root disturbance from transplanting all cause the taproot to divide or twist. Loosen the bed deeper, remove stones, and skip raw manure before the next sowing.
Can I start Tendersweet Carrot seeds indoors?
Direct sowing is strongly preferred. Carrots form their taproot early, and transplanting almost always causes forking or stunted roots. Sow where the carrots will mature, even if that means sowing into a deep container.
Why didn’t my carrot seeds sprout?
The most common cause is the surface drying out during germination. Carrot seed needs steady moisture for two to three weeks, and a single dry day can be enough to end the row. A light vermiculite or sifted-compost cover, gentle watering, and a shade strip during hot weather all help.
When should I thin my carrots?
Begin thinning when seedlings are 1 to 2 inches tall and continue until plants stand about 2 to 3 inches apart. Snipping at the soil line is gentler on neighboring roots than pulling. Later thinnings are edible as baby carrots.
Do I need to fertilize carrots?
Usually not, if you worked finished compost into the bed before sowing. Mid-season nitrogen tends to push leafy tops and degrade root quality.