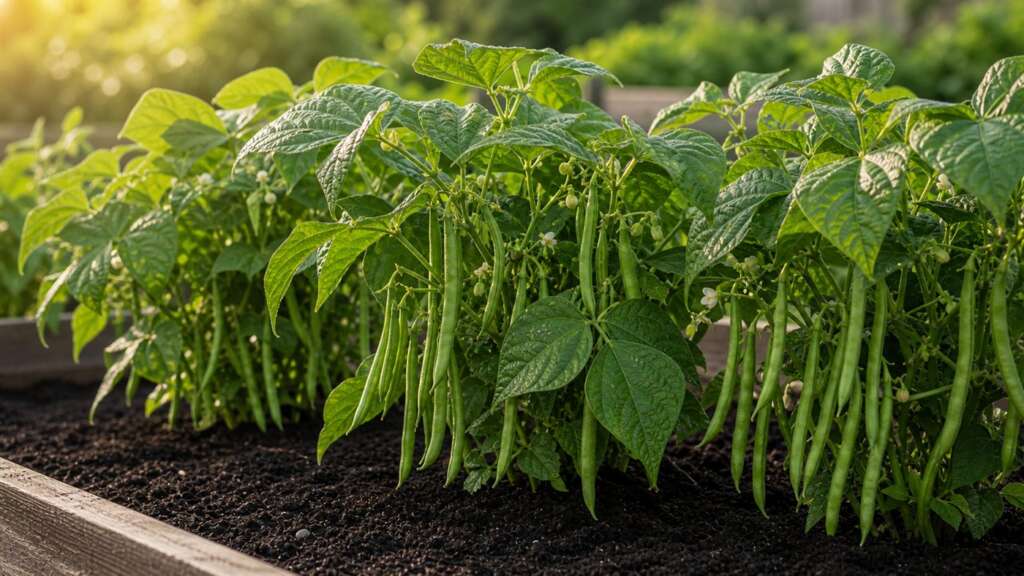
Provider is a classic green snap bean grown as a compact bush plant for steady, early harvests of round, medium-green pods. It is widely valued by home gardeners because it sets pods reliably in a fairly broad range of conditions and matures faster than many other snap beans. Like all common beans, it is a warm-season crop that does best when direct sown into soil that has truly warmed up after the last frost.
Quick How-to
Direct sow Provider bush bean outdoors after the last frost, once soil has warmed to roughly 65 F or higher. Plant seed about 1 inch deep with a little extra space between seeds, water gently, and keep the bed evenly moist rather than soggy. Expect emergence in about 6 to 10 days in warm soil. First harvest commonly begins around 50 to 55 days after sowing on healthy, unstressed plants.
Quick Guide
| Fact | Recommendation |
|---|---|
| Best method | Direct sow after the soil warms; indoor starting is rarely worth the root disturbance |
| Sowing depth | About 1 inch |
| Germination temperature | About 70 to 85 F is ideal; soil at least 65 F is the practical minimum |
| Days to germination | About 6 to 10 days in warm soil |
| Light for germination | Cover seed; light is not required until sprouts emerge |
| Spacing | Thin to about 3 to 6 inches apart in rows about 18 to 24 inches apart |
| Sun | Full sun, ideally 6 to 8 or more hours daily |
| Water | Even moisture, especially from flowering through pod fill |
| Harvest | Often about 50 to 55 days from sowing; verify final packet timing |
| Plant size | Compact bush habit, generally knee-high; no trellis required |
Before You Sow
Provider rewards patience at the front of the season more than almost any other step. Bean seed is a stored food packet wrapped in a thin coat, and that combination is exactly what soil microbes attack when the seed sits cold and wet. Wait for soil temperatures that consistently hold above 60 F, even at night. If your spring has been swinging between warm afternoons and cold mornings, give it another week. A short delay almost always produces a better stand than an aggressive early sowing.
Choose a sunny bed with loose, well-drained soil. Beans do not need heavy feeding; they form their own working relationship with soil bacteria that fix nitrogen at the roots. Excess nitrogen, especially from fresh manure or high-nitrogen fertilizer, tends to push a lot of leafy growth and can actually reduce pod set. If your soil is reasonably fertile and drains well after a rain, it is probably fine as is. Rake the surface smooth, break up clods, and remove large debris so seed can sit at an even depth.
If you are gardening on heavy clay or in a cool spring climate, consider mounding the row slightly. Raised soil warms faster, drains better after rain, and gives germinating beans the warm dry-ish pocket they prefer.
Direct Sowing
Make a shallow furrow about 1 inch deep. Drop seed every 2 to 3 inches along the row, knowing you will thin later if needed. Cover with soil, press gently for good seed contact, and water with a gentle spray so the row is not blasted into uneven depths. The seed itself does not need to be soaked first; warm moist soil is enough and is safer than presoaking, which can crack the seed coat and invite rot.
Keep the seedbed evenly moist while you wait for emergence. Avoid the common cycle of heavy watering followed by complete drying, which crusts the surface and traps tiny shoots underneath. If a hard crust forms after a rain, lightly scratch it open with your fingers or a tool. Once seedlings break the surface, you can usually back off on frequent shallow watering and water more deeply, less often.
When plants have their first true leaves, thin to about 3 to 6 inches apart in the row. Crowded beans compete for light and airflow, and crowded plantings tend to invite leaf disease later in the season. Snap the extras off at the soil line rather than pulling, so you do not disturb the roots of the keepers.
For a longer picking window, sow a short second planting about 2 to 3 weeks after the first, while weather is still favorable. This is one of the simplest ways to extend Provider’s harvest without buying a different variety.
Indoor Starting
Indoor starting is usually unnecessary for bush beans and can do more harm than good. Beans grow a substantial taproot quickly and dislike having that root disturbed at transplant time. If you genuinely need to bridge a cold spring or get a small early planting going, sow in deep individual cells or biodegradable pots about 2 to 3 weeks before your planned transplant date. Keep the mix warm, the light bright, and the indoor stay short. Transplant before roots circle the cell and water in well after planting out.
If you do not have a strong reason to start indoors, skip it. Direct-sown beans typically catch up with transplanted ones within a couple of weeks and skip the setback.
Soil, Sun, and Water
Full sun is non-negotiable for a productive bean planting. Less than about 6 hours of direct light usually means fewer flowers, fewer pods, and slower ripening. Soil should drain well after rain; standing water around the roots is one of the fastest ways to damage a young bean planting.
Water consistently from germination through pod fill. The most sensitive moments are flowering and the few weeks immediately after, when pods are sizing up. Soil that swings from bone dry to saturated during this window often produces fewer pods or pods that come in unevenly. A mulch of straw, shredded leaves, or grass clippings applied after the soil has fully warmed can stabilize moisture and suppress weeds.
When you water, aim at the soil rather than the leaves. Wet foliage that stays wet overnight is a common entry point for the fungal and bacterial leaf diseases that affect beans. For the same reason, avoid working among bean plants when they are wet from rain or dew.
Top Mistakes
- Sowing into cold, wet soil. This is the single most common reason bean stands fail. Cold soil delays germination, leaves the seed vulnerable to soil organisms, and produces patchy, weak rows. Wait for warmth.
- Burying seed too deep. A full 1 inch is usually plenty. Deeper sowings struggle to push through, especially in heavier soils that crust after watering.
- Overwatering after sowing. Seeds need oxygen as well as moisture. Aim for evenly damp, not saturated. Saturated beds invite rot before the seed even has a chance to sprout.
- Skipping the thinning step. Crowded beans look productive at first, then disappoint. Thin early so each plant has room to leaf out, flower, and breathe.
- Working among wet plants. Brushing past wet bean foliage to weed or harvest spreads leaf disease. Wait until plants are dry.
- Harvesting too late. Pods left until they are large and bumpy lose tenderness and signal the plant to slow new flowering. Pick on the early side and pick often.
Troubleshooting by Symptom
| Symptom | Likely causes | What to do next |
|---|---|---|
| No sprouts after 10 to 14 days | Soil still too cold, seed buried too deep, bed dried out, or surface crusted | Check soil warmth, scratch open any crust, resow at about 1 inch into freshly moistened soil if needed |
| Patchy stand with gaps | Uneven sowing depth, dry pockets in the row, or seed rotted in cool wet patches | Smooth and pre-moisten the bed before resowing the gaps, and wait for stable warmth |
| Seedlings collapse at the soil line | Damping-off conditions from cool, wet, poorly drained soil | Improve drainage, ease off on watering frequency, and avoid overhead watering at dusk |
| Plants grow lots of leaves but few flowers | Excess nitrogen, too much shade, or recent heat stress during flowering | Stop nitrogen feeding, confirm plants get full sun, and keep moisture steady through the next flowering flush |
| Flowers form but drop without pods | High heat during flowering, drought stress, or sudden swings in soil moisture | Mulch to even out moisture, water deeply at the soil line, and wait for temperatures to settle |
| Pods are tough or stringy | Harvested too late, or plants stressed by drought during pod fill | Pick young and often, and water more consistently through the next pod set |
| Yellowing or spotted leaves | Wet foliage, crowded planting, or splashing soil during watering | Water at soil level, thin if overcrowded, and add mulch to reduce soil splash |
| Holes in leaves or chewed seedlings | Slugs, bean beetles, or rabbits | Identify the specific pest before treating; hand-pick where possible and protect young rows with row cover if needed |
Germination Diagnostics
If a Provider sowing is slower than expected, work through the seed environment in order before assuming anything is wrong with the seed itself.
Start with soil temperature. Cool soil is the most common reason warm-season seed sits without moving. A simple soil thermometer pushed into the bed at the depth of the seed is more reliable than air temperature or calendar dates.
Next, check depth. Dig gently into the row and confirm seed is sitting at about 1 inch. Seed pushed deeper by heavy watering may have enough moisture but not enough stored energy to reach the surface.
Then check moisture. The seed zone should feel evenly damp, like a wrung-out sponge. Shiny wet soil is too much, and dust-dry soil is too little.
Finally, look at the surface. A baked crust after rain or heavy watering can pin tiny seedlings underneath. Lightly scratch the surface to break the crust and let new sprouts through.
If the bed is warm, properly moist, evenly sown, and uncrusted but you still see no movement after about two weeks, it is reasonable to resow the gaps. Beans are inexpensive to replant and a fresh sowing into now-warmer soil usually catches up quickly.
Timing and Climate Notes
Provider’s reputation as a dependable early bean comes from how readily it germinates once conditions are right, not from being able to defy cold soil. Aim for a sowing window that begins after your last frost and after a stretch of mild nights. In cool, late springs, plan around soil temperature rather than the calendar.
In hot-summer regions, an early sowing followed by a second sowing in late summer for a fall crop often produces better quality than a single midsummer planting that flowers during peak heat. Bean flowers tend to drop when daytime highs stay above the upper 80s F for extended stretches, so timing the heaviest flowering for cooler weeks pays off.
Container and Small-Space Notes
Provider can grow well in containers as long as the pot is deep and wide enough to support several plants. A container at least 12 inches deep and 14 inches wide can hold a small cluster of bush beans. Use a quality potting mix, set the pot in full sun, and water more often than you would in the ground; container soil dries faster, especially during the pod-fill stretch when plants drink heavily. Containers do not need a trellis for Provider; the bush habit is naturally self-supporting.
Harvest and Kitchen Use
Begin checking for picks around 50 days after sowing, or sooner if pods look ready. Provider’s snap beans are best harvested when pods are slim, firm, and snap cleanly between the fingers, before seeds inside have started to bulge against the pod wall. Holding the stem with one hand and pulling the pod with the other helps avoid tearing the plant.
Pick every two to three days during peak production. Frequent harvest is the single best thing you can do to keep a bush bean planting producing for as long as possible. Pods left to fully mature on the plant signal it to wind down.
In the kitchen, Provider behaves like a classic green snap bean. It steams, sautes, blanches, freezes, and pickles well. For freezing, blanch briefly in boiling water, plunge into ice water, drain, dry, and freeze flat on a tray before bagging.
Seed Saving
Provider is an open-pollinated variety, and common bean is largely self-pollinating, which makes home seed saving fairly straightforward. To save seed intentionally, leave a few healthy, productive plants unpicked and allow their pods to mature fully on the plant. Pods will dry, turn tan or straw-colored, and rattle when shaken.
Harvest dry pods before fall rains can rewet them. Shell the beans, spread them on a tray indoors, and let them dry further for a week or two until they are hard enough that they will shatter rather than dent when pressed with a fingernail. Store in a labeled, sealed container with the variety and year.
If you grow multiple bean varieties close together, expect some natural crossing over time. A planting separation between varieties, or saving from only one variety per season, helps keep saved seed true to type.
Seed Viability and Storage
Common bean seed often remains viable for about 3 to 4 years when stored cool, dry, dark, and sealed. Heat and humidity shorten that window considerably. If seed has lived through a warm summer in a garage or shed, run a small germination test on a damp paper towel before committing it to a main planting. A simple test of 10 seeds in a folded damp towel inside a plastic bag, kept warm for about a week, will give you a usable read on what to expect in the bed.
FAQ
Should I soak Provider bean seed before planting?
Soaking is generally unnecessary and can do more harm than good. Bean seed coats absorb water quickly in warm soil, and presoaked seed can crack or rot if conditions cool back down after planting. Sow directly into warm, evenly moist soil and let the bed do the work.
Do Provider bush beans need a trellis?
No. Provider is a true bush bean with a compact, self-supporting habit. A short line of plants holds itself up. Pole bean varieties are different and do need vertical support; Provider is not one of them.
Should I inoculate bean seed with rhizobia?
Inoculation can help in soils that have never grown beans or peas, since the bacteria that partner with bean roots may not be present yet. In established gardens that have grown beans before, the bacteria are usually already in the soil and a fresh inoculant adds little. It is a low-cost optional step rather than a requirement.
Can I plant Provider with other crops?
Yes. Bush beans share space well with many vegetables, and their light nitrogen-fixing habit can be a useful neighbor for crops that appreciate moderate fertility. Avoid planting beans where onions, garlic, or other alliums grew recently, since the two groups are sometimes reported to perform less well together.
Why did my whole row fail to come up?
The most common cause is sowing too early into cold, wet soil. Pull up a few seeds and check. If they feel soft, smell sour, or look dark and waterlogged, conditions were not right yet. Wait for warmer, drier soil and resow.
How often should I pick?
Every two to three days during active production. Frequent harvest keeps the plant flowering and pushes out more pods over a longer window.