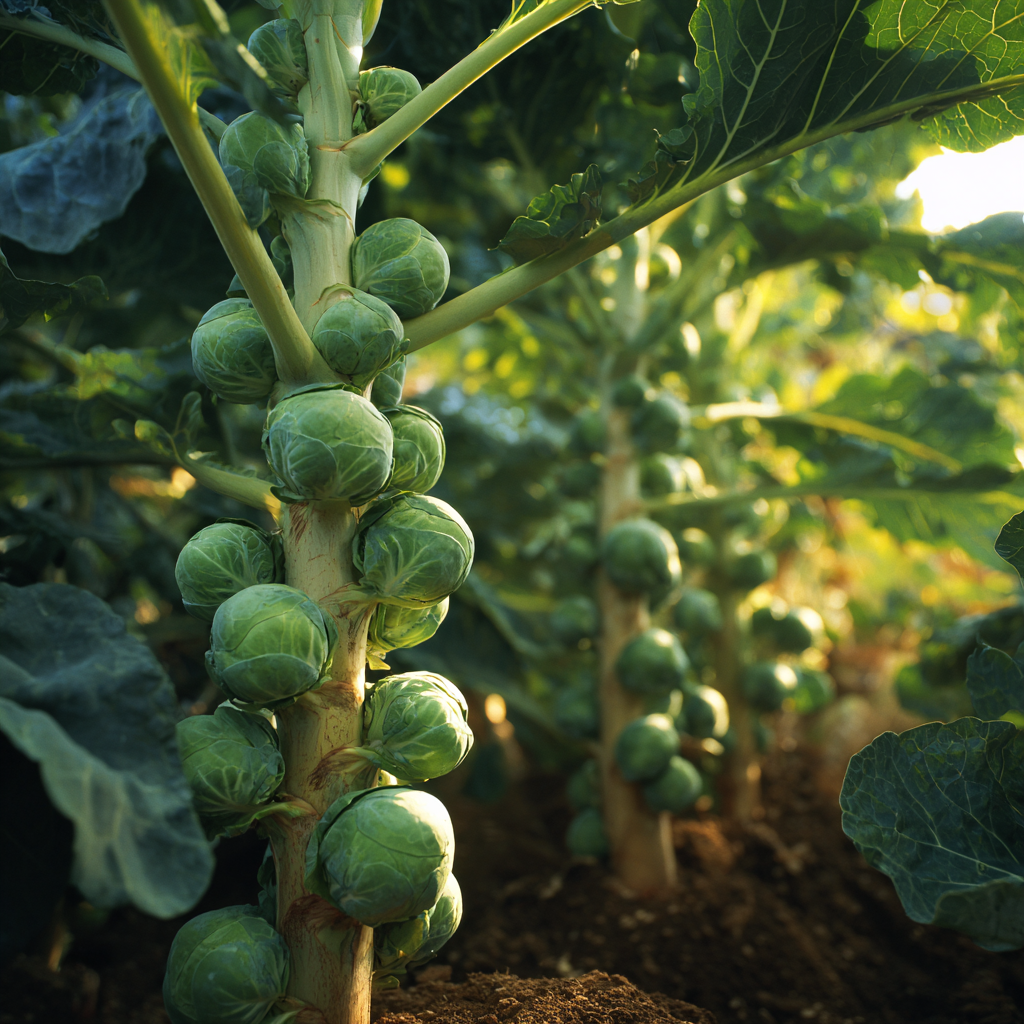
Long Island Improved is an open-pollinated heirloom Brussels sprout developed on Long Island, New York, in the late nineteenth century. It remains a useful choice for gardeners who want compact plants and dense blue-green sprouts for a cool-season harvest. Cool autumn weather supports firm sprout development and can improve sweetness; a frost can deepen flavor, but frost is not required for a good harvest. Plants commonly reach about 24 inches tall when given adequate time, fertility, and consistent moisture.
Quick How-to
Start Long Island Improved Brussels sprout seed indoors 4 to 6 weeks before your planned outdoor transplant date, timing the season so sprouts develop during cooling fall weather. Sow 1/4 to 1/2 inch deep in moist seed-starting mix, move seedlings under strong light as soon as they emerge, and transplant after hardening off. Space plants 18 to 24 inches apart in fertile, moisture-retentive soil. Harvest firm sprouts from the base of the stalk upward as they reach about 1 to 1.5 inches across; you may harvest before frost or leave sound plants through light frosts for a sweeter late crop.
Quick Guide
| Fact | Recommendation |
|---|---|
| Best method | Start indoors, then transplant |
| Sowing depth | 1/4 to 1/2 inch |
| Germination temperature | 60 to 85 F; standard indoor temps work well |
| Days to germination | About 5 to 10 days |
| Light for germination | Cover seed; provide strong overhead light at emergence |
| Spacing | 18 to 24 inches apart |
| Sun | Full sun |
| Water | Even moisture, roughly 1 inch per week |
| Days to harvest | 85 to 100 days from transplant, harvest continuing into winter |
| Plant size | Reaches about 24 inches tall; benefits from staking in exposed locations |
Before You Sow
Plan backward from your first expected fall frost. In most northern growing regions, seeds started indoors in late May or June produce transplants ready for the garden in late June or July. Those plants will then have the full growing season to develop stalks, set buds, and fill out sprouts through the lengthening cool days of autumn.
Use sterile, pre-moistened seed-starting mix in individual cells or small containers. A heating mat is unnecessary; standard indoor temperatures produce reliable germination without encouraging the leggy growth that heat can cause in brassica seedlings. Write the variety on a label before you plant, because Brussels sprout seedlings are easily confused with cabbage, broccoli, or kale starts of the same age.
Indoor Starting
Sow seeds 1/4 to 1/2 inch deep, cover gently, and press the mix lightly to ensure good seed-to-soil contact. Keep the mix evenly moist while waiting for germination, which typically occurs within a week at indoor temperatures. A humidity dome or plastic wrap can help maintain surface moisture until sprouts appear, but remove it promptly once seedlings emerge to keep air circulating around the delicate stems.
Move seedlings under strong, overhead light immediately after germination. Brussels sprout seedlings that grow in weak light or on a windowsill alone will develop thin stems that fail to support the plant through the outdoor season. Thin to one seedling per cell once the first true leaf appears.
Hardening Off and Transplanting
Hardening off is essential for brassica crops started indoors. Begin a week to ten days before planting, setting seedlings in a sheltered, partly shaded outdoor spot for increasing amounts of time each day. By the final day or two, they should be able to handle a full day outdoors in a bright, breezy location.
Transplant on an overcast day or during the evening to reduce transplant stress. Space plants 18 to 24 inches apart, plant at the same depth they grew indoors, and firm the soil gently around the roots. Water in thoroughly and add a layer of mulch around the base to retain moisture and moderate soil temperature through the remainder of the summer.
Soil, Sun, and Water
Long Island Improved does best in full sun. Partial shade produces plants that reach for the light and develop fewer, looser sprouts. Soil should be fertile and well-drained but capable of holding moisture through the growing season. A pH of 6.0 to 7.0 is ideal. Work compost into the planting area before setting transplants, and avoid planting in ground where brassicas grew in the previous few seasons.
Water deeply and consistently. Brussels sprouts that experience drought stress during sprout development produce small, open buttons that lack the tight, firm texture associated with a good harvest. Drip irrigation or soaker hoses at the base of the plant reduce leaf wetness and help avoid foliar disease pressure that is common in humid late-summer conditions.
Top Mistakes
- Mistiming the season: Long Island Improved needs a long growing season. Gardeners who transplant in August instead of July often find that sprouts are just beginning to form when hard frost cuts the season short. Start seeds on schedule and plan backward from your frost date.
- Planting in partial shade: Even moderate shade delays development and produces loose, poorly shaped sprouts. Brussels sprouts in home gardens often underperform simply because trees or structures shade them out by late afternoon.
- Spacing too closely: At 24 inches between plants, rows can seem sparse at transplant time, but plants fill in considerably. Crowded plants compete for light and airflow, which increases disease pressure as the season progresses into damp fall conditions.
- Waiting for frost after sprouts are already ready: Cool weather often improves flavor, but frost is not a ripeness requirement. Harvest firm lower sprouts promptly; oversized sprouts loosen, yellow, and lose quality while you wait for a calendar event.
- Ignoring caterpillar pressure in late summer: Late-summer heat brings cabbage loopers and imported cabbage worms just when young transplants are most vulnerable. Check the underside of leaves regularly and act early if you find eggs or small larvae.
Troubleshooting by Symptom
| Symptom | Likely causes | What to do next |
|---|---|---|
| No germination after 12 days indoors | Seed depth too great, surface dried out, or cool drafts cooling the mix | Check sowing depth, maintain even moisture, keep trays away from cold windows or air conditioning |
| Seedlings stretch and flop | Insufficient light, excess warmth, or too many seedlings per cell | Thin to one per cell, move under stronger overhead light, avoid heat mat once sprouted |
| Transplants drop lower leaves after planting | Normal transplant adjustment combined with drying or sun stress | Water consistently, provide temporary shade, and give the plant a week to settle |
| Sprouts form but stay small and loose | Warm weather during sprout development, drought stress, crowding, or late planting | Maintain consistent moisture and airflow; let healthy plants continue sizing as weather cools, but do not wait for frost if firm sprouts are already ready |
| Yellow leaves on lower stalk | Normal aging of lower leaves, nitrogen deficiency, or black rot | Remove aging lower leaves to improve airflow; assess whether yellowing is progressing up the stalk |
| Aphid colonies in growing tip | Common in warm weather; aphids cluster in the crown | Knock off with a firm water stream; use row cover earlier in the season to reduce colonization |
Harvest
Begin at the base of the stalk when the lowest sprouts are firm and roughly 1 to 1.5 inches in diameter. Twist each sprout downward and off the stalk, or use a sharp knife. Work your way upward over multiple harvests as the upper sprouts continue to enlarge. Remove the leaf immediately below each sprout before or at harvest to keep the stalk clean.
Plants can remain in the garden well into late fall and even early winter in many regions. Long Island Improved is cold-hardy enough to withstand temperatures around 20 F without significant damage. After a sustained hard freeze, pull stalks and store them upright in a cool cellar or garage; sprouts will continue to be harvestable for a few weeks in cold storage.
Seed Saving
Long Island Improved is open-pollinated, but producing true-to-type seed is a two-season project. Brussels sprouts are biennial and must survive winter before flowering. Their insect-pollinated flowers cross freely with cabbage, kale, kohlrabi, broccoli, cauliflower, and every other Brassica oleracea crop flowering at the same time. Seed Savers Exchange recommends 800 feet to one-half mile between varieties for seed purity. Grow only one B. oleracea seed crop when that distance is impractical, and keep several healthy plants so the saved population is not narrowed to one stalk.
Storing Leftover Seed
Keep unused Long Island Improved Brussels Sprout seed in its labeled packet inside a sealed container in a cool, dry, dark indoor location. Avoid garages, sheds, greenhouses, and sunny windowsills, where temperature and humidity swing sharply. Label home-saved seed with the variety and harvest year before storing it.
FAQ
Does Long Island Improved need frost before I harvest it?
No. Begin picking as soon as the lowest sprouts are firm, compact, and about 1 to 1.5 inches across. Cool nights and light frost can improve sweetness, so sound plants may remain outdoors for later harvest, but delaying already-mature sprouts only to wait for frost can produce loose or yellowing buttons.
Should I remove the top of the Brussels sprout plant to speed up harvest?
Topping, or pinching out the growing tip, is sometimes recommended in late summer to concentrate the plant’s energy into sizing up existing sprouts rather than continuing to produce new ones. This can be useful in short-season areas when you need to push development before hard frost. Remove about an inch of the growing tip in late August or early September if your season is closing in.
Can Long Island Improved Brussels sprouts survive snow?
Yes, mature plants tolerate light snow and temperatures down to around 20 F. Snow that melts quickly is generally not harmful. Extended hard freezes below that range will damage exposed sprouts and eventually kill the plant.
Is Brussels sprout a good container crop?
Brussels sprouts are too large and long-season for most containers. The plants need 18 to 24 inches of space per plant and a long, uninterrupted growing season. A raised bed or open garden row is a much better fit than any standard container.