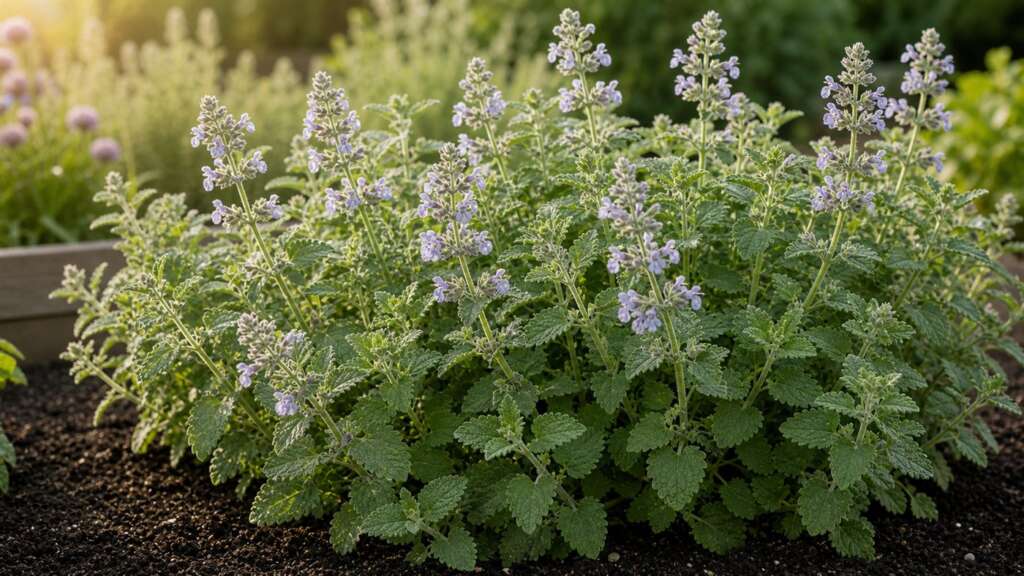
Catnip (*Nepeta cataria*) is a hardy mint-family perennial grown for fragrant, gray-green foliage, soft spikes of small white flowers, and the well-known appeal it has to cats. It is easy to start from seed once you understand a few quirks: the seed is small, germination can be uneven, and the plant prefers to grow lean and sunny rather than rich and pampered.
Quick How-to
Sow catnip in spring once hard freezes have passed, either by starting seedlings indoors 4 to 6 weeks before transplant time, or by direct sowing into a prepared bed once the soil has begun to warm. Surface sow or barely cover the seed, no more than 1/8 inch deep, and keep the seedbed evenly moist. Germination is typically 7 to 14 days at about 60 to 70 F, though some batches stretch closer to 21 days. Thin or transplant to roughly 18 inches apart and give the plants full sun and lean, well-drained soil.
Quick Guide
| Fact | Recommendation |
|---|---|
| Best method | Start indoors for an even stand, or direct sow once soil has warmed |
| Sowing depth | Surface sow or cover very lightly, no more than about 1/8 inch |
| Germination temperature | About 60 to 70 F is reliable |
| Days to germination | Often 7 to 14 days; can extend to 21 in cooler soil |
| Light for germination | Light contact helps; do not bury deeply |
| Spacing | Thin or transplant to about 18 inches apart |
| Sun | Full sun preferred; tolerates light afternoon shade |
| Water | Even moisture while young; drought-tolerant once established |
| Plant size | Perennial, typically about 2 to 3 feet tall and similarly wide; verify final packet height |
| Hardiness | Generally cold-hardy in USDA zones 3 to 9; verify for your area |
| Harvest | Cut leafy stems just before or as flower spikes begin opening |
Before You Sow
Catnip is forgiving once it is up and growing, but the seedling stage rewards a little care. The seeds are small and dark, easy to lose against potting mix or garden soil. Pre-moisten your seed-starting mix or pre-water the garden bed before sowing so the seeds stay where you place them.
Pick a permanent spot with that in mind: catnip is a perennial, it self-sows readily, and it spreads at the roots more slowly than spearmint but still steadily. A sunny corner near a path, a herb bed with defined edges, or a large container all work well. Many gardeners avoid planting catnip directly against vegetable beds where free-roaming or neighborhood cats might trample seedlings while rolling in the foliage.
If you have older seed or have struggled with sparse germination, a brief cold-moist treatment can help. Mix the seed with a pinch of damp sand or vermiculite in a labeled bag and refrigerate for about two to four weeks before sowing. Stratification is not required, but it can even out a slow batch. Verify the approach against current extension guidance for your region.
Indoor Starting
Indoor starting is the most predictable way to get a clean, evenly spaced stand of catnip. Sow 4 to 6 weeks before you plan to transplant out, which is usually around the average last frost date.
Fill clean cells or small pots with a light seed-starting mix. Press a few seeds onto the surface of each cell, then dust with a thin layer of mix, fine vermiculite, or sifted seed-starting medium. Press gently for soil contact and water with a fine spray so the seeds do not float away.
Keep the mix evenly moist, not soaked. A humidity dome or loose plastic cover helps the top layer stay damp during the first week, but lift it briefly each day for airflow and remove it entirely once sprouts appear. Catnip germinates well at typical indoor room temperatures, and a heat mat is usually unnecessary; if you use one, switch it off once seedlings emerge.
Strong overhead light is the most important factor after germination. Catnip seedlings stretch quickly in dim windows. Place a grow light a few inches above the tray, run it for long days, and lower it as plants grow. Thin to one strong seedling per cell as soon as you can tell which is sturdiest. When seedlings have two or three sets of true leaves and a developing root mass, harden them off and move them outside.
Direct Sowing
Direct sowing works well in mild spring weather. Wait until the soil has begun to warm and hard frosts are unlikely. Rake the surface smooth, water lightly to settle the bed, and scatter or place the seed thinly. Cover with no more than about 1/8 inch of fine soil, or simply press the seed into the surface and dust with vermiculite.
Mist or water gently so the seed is not washed deep or to one side. The top quarter-inch of soil needs to stay consistently moist until you see sprouts, which can take up to three weeks outdoors if nights are cool. A piece of light row cover or burlap over the row can slow surface drying and discourage scratching cats during germination; lift it as soon as seedlings appear.
Thin in stages once true leaves form, ending at about 18 inches between plants. Pulled thinnings make a fine first nibble for a cat at home or a small bunch for drying.
Transplanting and Spacing
Harden off indoor-grown seedlings over 7 to 10 days, starting in shade with shelter from wind and gradually moving them into full sun. Transplant on a calm, overcast day or in the late afternoon to reduce wilt.
Set plants at the same depth they grew in the cell. Catnip does not benefit from deep planting the way tomatoes do, and burying the crown can encourage stem rot in wet soil. Water in well, then back off to a normal watering rhythm so the roots reach down rather than staying shallow.
Final spacing of about 18 inches gives each plant room to bush out. Tighter spacing is fine for a quick first-year harvest, but mature catnip can sprawl, and crowded clumps trap humidity that invites powdery mildew later in the season.
Soil, Sun, and Water
Catnip prefers full sun and average to lean, well-drained soil. Sandy loam, gritty herb beds, and ordinary garden soil all suit it. Rich, heavily amended beds can produce lush foliage with weaker aroma; the essential oils that make catnip interesting to cats and to pollinators tend to concentrate when the plant is not over-fed.
Skip the heavy nitrogen. A modest top-dressing of compost at planting and again in early spring of the second year is usually enough. Mulch lightly with straw or shredded leaves to conserve moisture, but keep mulch pulled back an inch from the crown.
Water young plants while they establish, then ease off. Mature catnip is genuinely drought-tolerant and dislikes soggy roots, especially over winter. Soils that puddle or stay wet for days in spring are a common reason established clumps fail to come back.
Top Mistakes
- Burying the seed too deep: Catnip seed is small and needs to be at or just under the surface. Deep planting is the most common reason for sparse stands.
- Letting the surface dry during germination: The seedbed can feel damp an inch down while the top crusts over. Light, frequent misting beats one heavy soak during the first two weeks.
- Growing it in rich, wet soil: Over-fertilized, poorly drained beds give big leafy plants with weak aroma, more mildew, and shorter winter survival. Lean and bright is the goal.
- Skipping the second-year cutback: Catnip can look tired and woody after the first big flush of bloom. Cutting plants back by roughly half rejuvenates them for a second flush.
Troubleshooting by Symptom
| Symptom | Likely causes | What to do next |
|---|---|---|
| No sprouts after 21 days | Seed buried too deep, surface dried, soil too cold, or older seed losing vigor | Resow shallowly, keep the surface consistently moist, wait for warmer soil, and test a small sample of older seed before relying on it |
| Patchy, uneven germination | Inconsistent surface moisture, seed washed into clumps, cool snaps, or rough cloddy soil | Smooth the bed, water with a fine spray, and consider a thin row cover to even out conditions |
| Seedlings tall, pale, falling over | Weak light after germination, too much warmth indoors, or crowded cells | Move plants closer to a grow light, drop the heat, and thin to one seedling per cell |
| Seedlings collapse at the soil line | Damping-off from saturated mix and poor airflow | Improve airflow, water from below if possible, and start over with clean mix and trays |
| Established plants flop open in the middle | Heavy bloom load, rich soil, or shade on one side | Cut the plant back by about half after the first flush and stake or hoop sprawling clumps |
| White powdery coating on leaves | Powdery mildew, often in humid, crowded, or shaded conditions | Improve airflow by thinning stems, cut back affected growth, and water at the base rather than overhead |
| Sudden trampled, broken plants | Free-roaming cats rolling in the foliage | Protect young plants with a low cage of chicken wire or twiggy brush until they are tough enough to bounce back |
Container and Small-Space Notes
Catnip grows well in containers with at least a 2 to 3 gallon volume, drainage holes, and a position that gets most of the day in sun. A container also makes it easier to lift the plant out of reach during the first few weeks if neighborhood cats are persistent.
Use a free-draining potting mix, not garden soil. Water when the top inch feels dry, and feed lightly only once or twice through the season. In cold-winter climates, plunge the pot into a sheltered garden bed or move it against a south-facing wall to help the roots survive freezing temperatures.
Harvest, Bloom, and Use
Catnip leaves are most aromatic just before or as flower spikes begin opening. Cut leafy stems with sharp scissors or garden snips in mid-morning, after dew has dried but before the heat of the day. Take no more than about a third of the plant at a time so it can keep producing.
Bundle small handfuls and hang them upside down in a warm, dark, airy place for one to two weeks, or lay the stems flat on a screen. Once the leaves crumble easily, strip them from the stems and store in airtight jars away from light and heat. Fresh leaves can also be tucked into homemade cat toys, used as a calming tea for human consumption in moderation according to verified herbal guidance, or left on the plant for bees and other small pollinators.
After the main bloom, cut the plant back by roughly half. Most catnip rebounds with a fresh flush of leaves and a smaller second bloom, especially when the weather cools again in late summer.
Seed Saving
Catnip sets seed easily. Let a few flower spikes mature and dry on the plant until the calyces feel papery and the tiny seeds rattle when you brush the stem. Cut the stems into a paper bag, finish drying indoors for a week, then rub the dried heads between your palms to release the seed. Sieve out the chaff over a sheet of paper.
Label the bag or jar with the variety and the harvest year. Because catnip self-sows readily, expect volunteer seedlings around the parent plant each spring; thin or transplant them while they are young if you want to control the patch.
Seed Viability and Storage
Catnip seed commonly stores well for about 3 to 5 years when kept cool, dry, dark, and sealed. Older seed often still sprouts but may emerge unevenly. Run a small germination test on a damp paper towel before committing older seed to a main planting.
FAQ
Does catnip need light to germinate?
A light cover or surface contact is fine. The seed is small, so the real rule is to keep it shallow rather than to leave it completely exposed. Burying it more than about 1/8 inch is the more common problem.
Should I cold-stratify catnip seed before sowing?
It is not required. Fresh seed sown in mild conditions usually germinates without any special treatment. A two to four week cold-moist stratification can even out germination for older or slow batches.
Will catnip take over my garden?
It can self-sow generously, and the roots spread more slowly than true mints. Containers, defined edges, and cutting flower heads before they fully ripen keep a planting in bounds.
Is catnip the same as catmint?
In gardening conversation, the names overlap. *Nepeta cataria* is true catnip, the plant most strongly associated with cat response. Ornamental catmints such as *Nepeta x faassenii* are closely related but bred more for tidy mounds and lavender-blue flowers, with less effect on cats.
When is the best time to harvest for the strongest aroma?
Cut leafy stems in the morning, just before or as the flower spikes begin to open. That stage typically carries the strongest concentration of aromatic oils.