“`
# How to Grow Black-Eyed Susan from Seed
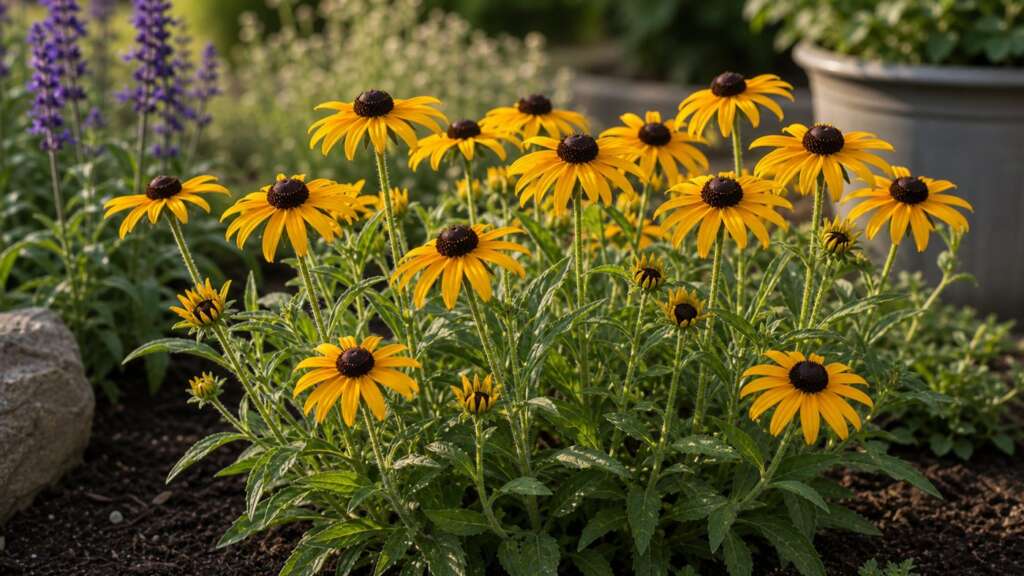
Black-Eyed Susan (Rudbeckia hirta) is a native North American wildflower grown for golden-yellow daisy blooms with dark cone centers, long mid-summer to fall color, and strong pollinator value. Depending on climate and timing, it behaves as an annual, a biennial, or a short-lived perennial. Seed is small and needs light to germinate well, so the most reliable approach is to sow it on or very near the soil surface, keep the seedbed evenly moist, and grow the seedlings in strong sun.
Quick How-to
Sow Black-Eyed Susan in spring after the worst of the cold has passed, or in fall in milder climates so seed can settle in and chill naturally over winter. Press seed onto the surface or cover it with only a very thin dusting of fine soil; light helps germination. Keep the top layer of soil consistently moist and expect sprouts in about 7 to 21 days when soil is roughly 65 to 75 F. Thin or transplant early so each plant has full sun, airflow, and room to form a sturdy clump.
Quick Guide
| Fact | Recommendation |
|---|---|
| Best method | Direct sow preferred; indoor start 6 to 8 weeks before transplanting also works |
| Sowing depth | Surface sow or barely cover, about 1/16 inch; seed needs light |
| Germination temperature | About 65 to 75 F is ideal |
| Days to germination | About 7 to 21 days |
| Light for germination | Light is helpful; do not bury deeply |
| Spacing | Thin to about 12 to 18 inches apart |
| Sun | Full sun |
| Water | Keep the surface evenly moist until established; drought-tolerant later |
| Bloom timing | Often mid-summer into fall; first-year bloom depends on strain and sowing date |
| Plant size | Commonly about 2 to 3 feet tall; verify final packet height |
Before You Sow
Black-Eyed Susan is forgiving once it takes hold, but the seed itself is tiny and easy to lose if it is buried or washed away. Choose a sunny spot with reasonable drainage. The plant tolerates clay, sandy soil, and average garden loam, and it does not need rich feeding to bloom well. In fact, very fertile beds can push leafy growth at the expense of flowers.
Prepare the bed by raking out clods, removing surface weeds, and firming the soil lightly so seed can rest against a flat, stable surface. If the bed is dusty dry, water it the day before you sow so the first irrigation after planting does not splash seed around. When sowing into a container, choose a pot at least 8 to 10 inches deep with drainage holes, and use a light potting mix rather than dense garden soil. Label every row and pot; Rudbeckia seedlings can look similar to other young composites in the first few weeks.
Direct Sowing
Direct sowing usually gives the strongest plants because the roots establish without transplant shock. In spring, wait until the soil has begun to warm and night temperatures are not bitter; this is typically around the time deciduous trees are leafing out. In fall, sow several weeks before hard frost so seed has time to settle but not enough warm weather to push tender seedlings into cold.
Scatter seed thinly over the prepared surface, or place individual seeds where you want plants. Press gently with your hand or the back of a rake so seed makes firm contact with the soil. A barely-there dusting of fine soil or sifted compost helps anchor seed against wind and birds without blocking light. Water with a fine spray; a coarse stream can wash tiny seed into corners and create bare patches.
Keep the top quarter inch of soil consistently damp until you see sprouts. The first true leaves will look spoon-shaped and slightly fuzzy. Once seedlings are 1 to 2 inches tall, thin in stages to a final spacing of about 12 to 18 inches.
Indoor Starting
Indoor starting is useful when you want a few well-placed plants, when spring is short, or when birds and slugs make outdoor sowing risky. Sow 6 to 8 weeks before your intended transplant date.
Fill clean cells or shallow trays with pre-moistened seed-starting mix, press seed onto the surface, and dust only very lightly if at all. Cover the tray with a humidity dome or plastic until germination, then remove the cover immediately so airflow improves. Place seedlings under strong overhead light as soon as they sprout; weak window light is the most common reason indoor flower seedlings turn tall, pale, and weak.
Pot up if roots fill the cell before transplant weather arrives. Harden off seedlings over 7 to 10 days, starting with a few hours in sheltered shade and gradually adding sun, wind, and time outdoors. Transplant on a mild, overcast day if possible, water in well, and protect young plants from heavy rain or strong sun for the first few days.
Soil, Sun, and Water
Full sun, ideally 6 or more hours of direct light, gives the best stem strength and bloom count. In hot southern climates, a little afternoon shade is tolerated, but heavy shade leads to floppy plants and disappointing flowering. Soil should drain freely. Rudbeckia hirta dislikes saturated winter soil more than most other conditions, and wet crowns can shorten the plant’s life.
Until germination, focus on steady surface moisture. After plants establish their first true leaves and a small root system, switch to deeper, less frequent watering. Mature plants are notably drought-tolerant and prefer a soaking once the top inch or two has dried over chronic light watering. Skip routine fertilizing; a light compost top-dressing in spring is usually enough.
Transplanting and Spacing
If you grew transplants or are moving volunteers, set plants out at the same depth they grew in their cells. Space about 12 to 18 inches apart so mature clumps have airflow on all sides; crowded Rudbeckia is more prone to powdery mildew on its lower leaves late in the season. Water in thoroughly, then ease off as the plants begin to grow on their own.
Top Mistakes
- Burying the seed: Black-Eyed Susan seed is tiny and benefits from light. Covering it more than a thin dusting often delays or thins out germination.
- Letting the seedbed crust: A hard, dry crust can stop sprouts from breaking through even when seed has started to grow. Mist the surface gently and frequently during the germination window.
- Sowing into a weedy bed: Rudbeckia seedlings are slow to compete in their first few weeks. Clean the bed before sowing so volunteers do not outpace them.
- Too much shade or too much nitrogen: Both push plants toward leaves rather than blooms. Choose a full-sun site and resist the urge to feed heavily.
- Skipping thinning: Seedlings that look healthy at the four-leaf stage will crowd themselves into weak, leaning plants if not thinned. Thin before leaves overlap.
Troubleshooting by Symptom
| Symptom | Likely causes | What to do next |
|---|---|---|
| No sprouts after 21 days | Seed buried too deep, surface dried out repeatedly, soil too cold, or birds removed seed | Resow shallowly, press for soil contact, keep the surface lightly moist, and protect with row cover if birds are active |
| Patchy, uneven stand | Seed washed by hard watering, cloddy seedbed, or inconsistent moisture | Smooth the bed before sowing, water with a fine spray, and overseed thin patches |
| Seedlings are tall, pale, and floppy | Not enough light, too much warmth indoors, or crowding | Move under stronger overhead light, lower temperatures, and thin promptly |
| Seedlings collapse at the soil line | Overly wet mix, poor airflow, or damping-off conditions | Improve airflow, water from below when possible, use fresh seed-starting mix, and avoid saturated trays |
| Plants grow lush leaves but few flowers | Too much shade, excess nitrogen, or very young first-year plants | Move to full sun, stop feeding, and be patient with biennial-type strains that often bloom heavily the second year |
| White powdery coating on lower leaves | Powdery mildew, common late in the season with crowding or humid nights | Improve airflow, remove worst leaves, water at the soil level, and space new plantings farther apart |
| Plant disappears after a wet winter | Crown rot from saturated, cold soil | Replant in a better-drained spot, raise the bed, or amend soil with grit or compost |
Germination Diagnostics
If germination is slow or uneven, walk through the factors one at a time before assuming the planting has failed. First check depth: scrape away the soil over a few seeds with the tip of a finger. Anything buried more than about an eighth of an inch is too deep and may need to be resown on the surface.
Next, check temperature. Soil that feels cool to the touch in the morning is often well below the 65 to 75 F range Rudbeckia prefers. A simple soil thermometer takes the guessing out of timing, especially for early spring sowings.
Then check moisture. The seed zone should feel evenly damp, like a wrung-out sponge, not glossy wet and not powdery. A surface that dries and crusts between waterings is one of the most common reasons sprouts fail to break through. Light, frequent misting works better than occasional heavy soaking during the germination window.
Finally, check light and airflow after emergence. Sprouts that come up healthy but then stretch, pale, or wilt usually want stronger overhead light, fewer neighbors, less standing humidity, or a slightly drier mix. Adjust one variable at a time so you can see what actually helped.
Timing and Climate Notes
Spring and fall sowings tend to be the most forgiving. In cold-winter regions, a late-summer or early-fall sowing lets seed experience natural chilling, which can improve germination for some perennial strains and produce vigorous spring seedlings. In warm-winter regions, a fall sowing often produces robust plants that bloom by early summer.
Mid-summer sowings into hot, dry soil are the hardest. If you must sow in heat, choose a partially shaded spot, sow in the evening, and plan to water lightly twice a day until seedlings establish.
Container and Small-Space Notes
Black-Eyed Susan can be grown in containers if the pot is generous in size and drains freely. Aim for at least a 2- to 3-gallon container per plant, use a quality potting mix, and place the pot where it gets full sun for most of the day. Container plants depend entirely on you for watering and will not survive the same dry stretches an in-ground plant tolerates.
In small beds, treat Black-Eyed Susan as the cheerful mid-border anchor. Plant in groups of three to five rather than singles; clumps read better visually and support pollinators more effectively.
Bloom Care, Cutting, and Wildlife
Cut flowers when they have just opened and the cone center is still tight; stems will hold up well in a vase. Regular cutting and light deadheading extend the bloom season and encourage more buds. Toward fall, leave a portion of the seed heads standing. Goldfinches and other songbirds feed on Rudbeckia seed into winter, and standing stems offer cover for overwintering beneficial insects.
For tidy garden beds, you can deadhead in summer for repeat bloom and then stop deadheading in late summer so a fall crop of seed heads can ripen for wildlife and self-sowing.
Seed Saving
Let chosen seed heads stay on the plant until the cones turn dark brown and dry to the touch. Snap or snip the heads on a dry day and finish drying them indoors on a screen or paper for a week. Rub the heads between your hands to release the small dark seeds, then winnow away the chaff. Store in a labeled, sealed envelope or jar with the variety and year.
If several Rudbeckia varieties grow near each other, expect some variation in the next generation, since bees move pollen freely between similar species and strains.
Seed Viability and Storage
A practical planning range for Rudbeckia hirta seed is about 2 to 3 years when stored cool, dry, dark, and sealed. Older seed can still sprout, especially if it has been kept in a stable, low-humidity environment. When in doubt, run a small germination test by sprouting 10 to 20 seeds on a damp paper towel inside a closed container for two to three weeks before committing the rest to a main planting.
FAQ
Does Black-Eyed Susan need cold stratification?
Some perennial strains germinate more evenly after a few weeks of cold, moist conditions. Many garden strains sprout fine without it, especially when sown outdoors in spring or fall. If you have had poor results from a winter-stored packet, try a fall sowing or refrigerate moistened seed in a labeled bag for about 30 days before spring sowing.
Can I direct sow Black-Eyed Susan?
Yes. Direct sowing into a prepared, weed-free bed is usually the simplest path to a strong stand. Press seed onto the surface, dust very lightly if at all, and keep the top layer evenly moist until you see sprouts.
Will it bloom the first year?
It depends on strain and timing. Plants started indoors in late winter or sown very early outdoors often bloom the first summer, while later sowings frequently behave as biennials and put on a much bigger show their second year.
Is Black-Eyed Susan a true perennial?
Rudbeckia hirta is often described as a short-lived perennial or biennial. It commonly returns for two or three seasons and reseeds itself, so a patch can persist for years even if individual plants do not.
Should I cut it back in fall?
You can, but leaving stems and seed heads standing through winter feeds birds and shelters beneficial insects. Many gardeners compromise by tidying the front of the border in fall and leaving back-of-border clumps standing until late winter.
Should I leave seed heads?
Leaving at least some seed heads supports wildlife and allows light self-seeding. Collect or cut others if you want to limit volunteer seedlings or save seed for next year.