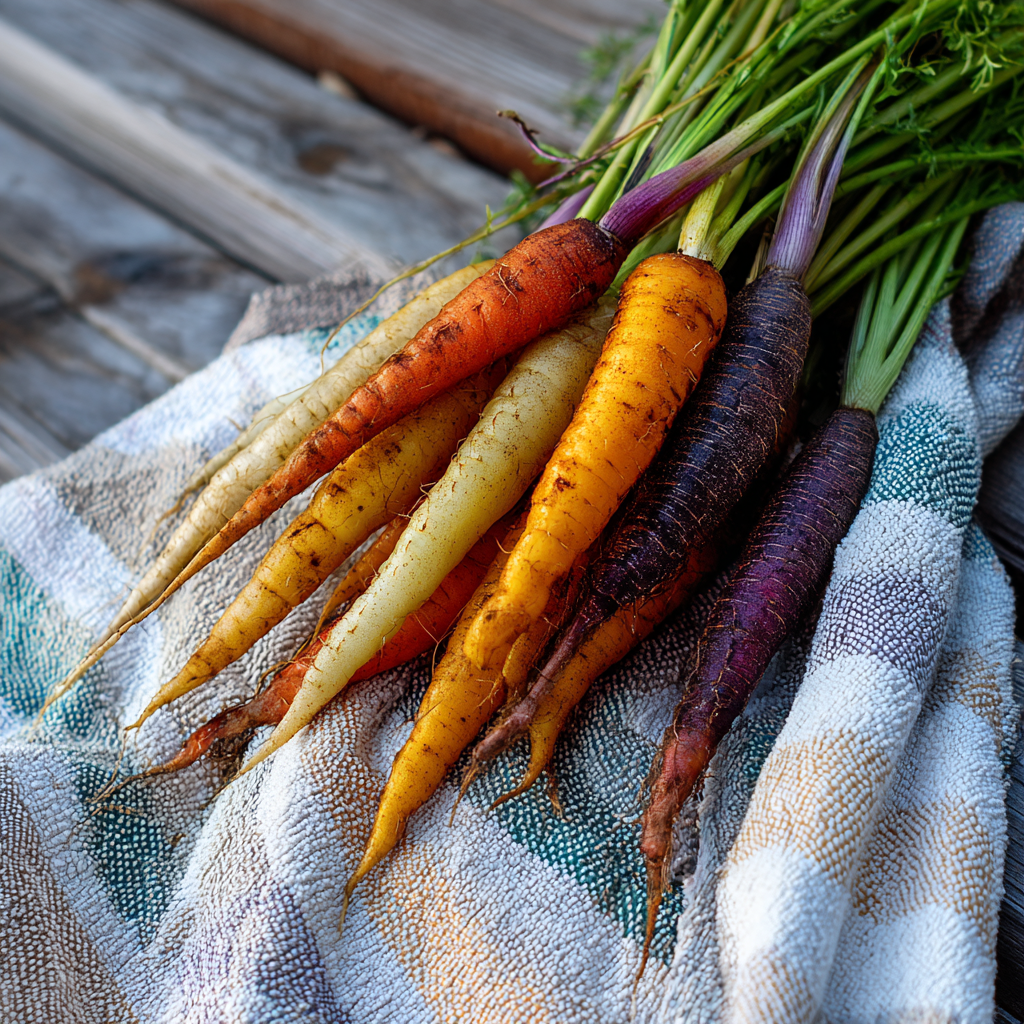
Rainbow Carrot Mix is a cool-season root crop grown for a colorful harvest that typically includes orange, yellow, white, purple, and red roots in varying proportions depending on the blend. Carrots are technically biennials, but home gardeners grow them as a single-season crop and pull the roots before the plant bolts in its second year. The growing concept is simple ΓÇö sow shallow, keep moist, thin on time ΓÇö but the seedbed itself is where most of the success or failure is decided.
Quick How-to
Direct sow Rainbow Carrot Mix where the roots will mature, two to three weeks before your average last spring frost or about 10 to 12 weeks before the first fall frost. Loosen the bed deeply, remove rocks, and sow seed about 1/4 inch deep in a smooth furrow. Cover lightly with fine soil, sifted compost, or vermiculite and keep the surface evenly moist every day until seedlings appear, which often takes 10 to 21 days. Thin in two passes to a final spacing of about 2 to 3 inches. Water steadily, mulch once tops are up, and pull roots when shoulders show full color and pencil-thick width or more.
Quick Guide
| Fact | Recommendation |
|---|---|
| Best method | Direct sow only; do not transplant |
| Sowing depth | About 1/4 inch, covered lightly |
| Soil temperature | About 55 to 75 F for steady germination; 70 F is often fastest |
| Days to germination | Often 10 to 21 days; cool soil is slower |
| Spacing | Thin in stages to 2 to 3 inches apart in rows 12 to 18 inches apart |
| Sun | Full sun preferred; light afternoon shade tolerated in hot weather |
| Water | Keep the surface evenly moist through germination, then shift to deeper, steadier watering |
| Days to harvest | Often about 60 to 75 days from sowing; verify packet timing for the blend |
| Root size at harvest | Typically pencil-thick to about 1 inch across; smaller for tender baby roots |
Before You Sow
Carrot beds repay any work you put into them before the seed goes in the ground. The taproot forms within the first weeks and follows the path of least resistance, so anything stiff or stony in the top 8 to 10 inches will deflect the root and produce forks, twists, or stubby shoulders.
Loosen the bed deeper than the mature root you want. A garden fork or broadfork is ideal because it opens the soil without inverting layers. Pull out rocks, sticks, and large clods, and break the surface into a fine, even crumb. If your native soil is heavy clay or full of stones, build a raised row or shallow box of loosened soil and sifted compost on top ΓÇö carrots grown in a fluffed mound almost always look better than the same variety wrestling through a hard bed.
Avoid adding fresh manure or heavy nitrogen before planting. Both push leafy top growth at the expense of clean root shape, and fresh manure in particular is a classic cause of branching, hairy roots. Well-finished compost worked in lightly is fine. Water the bed the day before sowing so the surface is moist but not muddy, then rake it smooth right before you open the row.
Rainbow blends are made up of more than one variety, so the colored roots will not all mature at exactly the same rate. Plan to harvest selectively rather than clearing the whole row at once, and consider sowing in short successions every two to three weeks for a longer harvest window.
Direct Sowing
Open a shallow furrow about 1/4 inch deep with the edge of a board, a stick, or your finger. Carrot seed is small and irregular, so the easiest method for most gardeners is to pinch a thin line of seed along the furrow rather than trying to space each seed individually. Aim for roughly one seed per half inch; you will thin to final spacing later.
Cover the seed lightly. Fine sifted compost, seed-starting mix, or horticultural vermiculite all work well because they resist crusting and let the seedlings push through. A common mistake is burying carrot seed in a heavy garden-soil cover that bakes into a hard cap after the first watering. Press the row gently with the back of a hoe or your palm for soil contact, then water with a fine spray or rose nozzle so the seed is not washed into clumps.
If you are sowing into containers, choose a vessel at least 10 to 12 inches deep, and deeper if you want full-length roots. Wide window boxes and fabric grow bags both work. Fill with a light, well-drained potting mix rather than dense garden soil.
Keeping the Row Moist
This is the single most important task during the first three weeks. Carrot germination is slow, and the seed sits in the top 1/4 inch of soil where the surface dries fastest. One hot afternoon of bone-dry crust can stall a whole sowing.
Check the row daily and water gently whenever the surface starts to dry. In hot, windy, or sunny weather, that may mean a light watering once or twice a day. A few tools help:
- Vermiculite cover. A thin layer over the seed holds moisture and resists crusting better than plain soil.
- Shade strip or board. A length of burlap, shade cloth, or a flat board laid directly over the row keeps the surface cool and damp. Lift it daily to check, and remove it the moment you see green sprouts ΓÇö leaving cover on past emergence produces pale, weak seedlings.
- Light mulch alongside. Once seedlings are up, a thin mulch between rows helps the bed hold moisture without burying the tiny plants.
Why You Do Not Transplant Carrots
Carrots form their taproot within the first few weeks of growth. Lifting a seedling and replanting it almost always damages or kinks that root, which then heals into a forked, stunted, or curled carrot. Direct sowing is the only reliable method, and it is also why thinning matters ΓÇö once a seedling is up, where it stands is where it stays.
Thinning
Thinning feels wasteful and it is the step beginners most often skip, but crowded carrots simply cannot size up. Roots compete for the same narrow band of soil and end up thin, twisted, or stalled at pencil width.
Thin in two passes:
1. First thin when seedlings are about 1 to 2 inches tall and have their first true ferny leaves. Remove the weakest seedlings to leave one carrot every 1 inch. 2. Second thin two to three weeks later, after the tops are 3 to 4 inches tall, to a final spacing of about 2 to 3 inches.
Snip thinnings at soil level with scissors rather than pulling, especially in the second pass. Pulling disturbs the neighboring roots you want to keep. The thinnings themselves are edible ΓÇö small carrot tops and pencil roots can go straight into a salad.
Soil, Sun, and Water
Carrots prefer full sun but tolerate light afternoon shade in hot regions, where a few hours of relief can keep flavor sweet. Soil should be loose, deep, well-drained, and on the lighter side of neutral pH. Sandy loams produce some of the cleanest carrots; heavy clay or stony ground is the hardest start.
Once seedlings are established, shift your watering style. Instead of misting the surface, water more deeply and a little less often so moisture moves down into the root zone and roots follow it. The goal is steady moisture ΓÇö not a swing from bone-dry to soaked. Big swings are a common cause of cracked or split roots, especially as carrots approach harvest size.
A 1 to 2 inch mulch of straw, shredded leaves, or fine compost between rows once seedlings are up helps hold moisture, keep soil cool, and shade exposed root shoulders so they color evenly without turning green or bitter at the top.
Top Mistakes
- Letting the seed row dry out. Carrot germination is slow, and a single dry day during week one or two can wipe out a whole sowing. Check moisture daily.
- Burying seed too deep. A 1/4 inch is plenty. Heavy cover plus crusting prevents emergence.
- Skipping or delaying thinning. Crowded carrots stay thin no matter how rich the soil or how patient the gardener.
- Sowing into rocky, lumpy, or freshly manured ground. Forked, hairy, and stubby roots usually trace back to the seedbed, not the seed.
- Sowing too late into heat. Carrots germinate poorly in hot, dry soil and the resulting roots can taste bitter or woody. Time sowings for the cool shoulders of the year.
Troubleshooting by Symptom
| Symptom | Likely causes | What to do next |
|---|---|---|
| Very patchy or no germination after three weeks | Surface dried or crusted, seed buried too deep, soil too hot, or row washed unevenly | Smooth and re-sow shallowly, cover with vermiculite, water gently every day, and consider a shade strip until sprouts appear |
| Forked or twisted roots | Rocks or clods in the bed, hard subsoil, fresh manure, or transplant damage | Loosen the bed deeper next time, sift out stones, skip fresh manure, and direct sow only |
| Hairy roots with many side rootlets | Excess nitrogen or fresh manure in the bed | Plant in a less recently fed bed and rely on finished compost rather than high-nitrogen amendments |
| Lots of tall ferny tops, small or stalled roots | Crowding, excess nitrogen, or poor light | Thin to 2 to 3 inches promptly, ease back on nitrogen feeding, and give full sun |
| Cracked or split roots near harvest | Sudden heavy watering or rain after a dry stretch | Water more evenly through the final weeks; mulch helps buffer the swings |
| Green or bitter shoulders | Root tops exposed to sun as they push up | Mound a little soil or mulch over exposed shoulders during the second half of the season |
| Bitter, woody, or fibrous roots | Heat stress, drought, or roots left in the ground past prime | Harvest younger, water steadily, and shift main sowings to cooler windows |
| Pale orange or muted colors in the blend | Mixed genetics in a rainbow blend; some varieties are naturally paler; harvest age also shifts color intensity | Let a few roots size up fully before pulling the row, and accept natural variation from a mix |
Harvest and Use
Rainbow blends do not size up in unison. Different colored varieties in the same packet often mature at slightly different rates, so plan to harvest selectively rather than pulling the whole row at once.
Start checking for harvest size about 50 to 60 days after sowing for most blends. Brush soil aside at the top of the row to see how wide the shoulders have grown. Pencil-thick roots are tender and sweet; full-size roots typically run about 3/4 to 1 inch across at the shoulder, depending on variety. Pull a test root, taste it, and decide whether to keep going.
To harvest, loosen the soil alongside the row with a fork rather than yanking straight up ΓÇö the tops can snap off cleanly while the root stays in the ground. Twist off the green tops within a few hours of harvest; tops left on will keep pulling moisture out of the root in storage.
Carrots store well in the refrigerator crisper drawer, ideally in a sealed bag or container to hold humidity, for several weeks. For longer storage, leave a small stub of stem and pack roots in damp sand or sawdust in a cool place. Fall-grown carrots can often be left in the ground under a thick mulch and pulled as needed through early winter in mild climates; flavor often sweetens after a light frost.
The colored roots cook a little differently from standard orange carrots. Purple varieties in particular can bleed color into cooking liquid, which is normal. For full color on the plate, roast or steam rather than boil.
Seed Saving
Carrots are biennials. To save seed, plants must overwinter and flower in their second year, which most home gardeners do not attempt. Carrots also cross readily with other carrot varieties ΓÇö and with wild Queen Anne’s lace ΓÇö within considerable distances, so a Rainbow Mix saved at home is unlikely to come true unless you can isolate it. Fresh purchased seed of a blend is generally the simpler and more predictable choice.
If you do want to try, select healthy, well-shaped roots, replant them in spring after winter storage or leave them in the ground over a mild winter, let the umbels mature and dry on the plant, and collect, dry, and label seed by variety and year.
Seed Viability and Storage
Carrot seed is generally considered viable for about 3 years when stored cool, dry, dark, and sealed ΓÇö shorter than many vegetable seeds. Heat and humidity shorten that window quickly, so avoid storing packets in garages, sheds, greenhouses, or sunny windowsills. If your seed is older or has been stored in uncertain conditions, sprout a small sample of about 10 seeds between damp paper towels at room temperature for two to three weeks before committing the rest of the packet to a full sowing.
FAQ
Can I start Rainbow Carrot Mix indoors and transplant?
No. Carrots form an early taproot that almost always twists or forks when transplanted. Direct sow into the bed where the roots will grow.
Why did only certain colors come up in my harvest?
Rainbow blends are mixtures of several varieties combined in a single packet, and the proportions of each color vary from packet to packet. Germination, thinning, and harvest timing also shift which colors dominate the final pull. Some color variation is expected and not a sign that anything went wrong.
How do I keep the row from drying out?
Cover seed with vermiculite or fine sifted compost rather than heavy soil, water gently with a fine spray, and lay a board or strip of burlap directly over the row to hold moisture. Lift the cover daily and remove it the moment sprouts appear.
Can I grow Rainbow Carrot Mix in containers?
Yes. Use a container at least 10 to 12 inches deep, deeper for full-length roots, with light well-drained potting mix and good drainage. Containers dry faster than garden beds, so check soil moisture daily, especially during germination.
When is the best time to sow?
Two to three weeks before your average last spring frost is a strong spring window, and about 10 to 12 weeks before your first fall frost is often the best-flavored fall window. Avoid sowing into the hottest part of summer; germination is poor and the resulting roots can taste bitter.