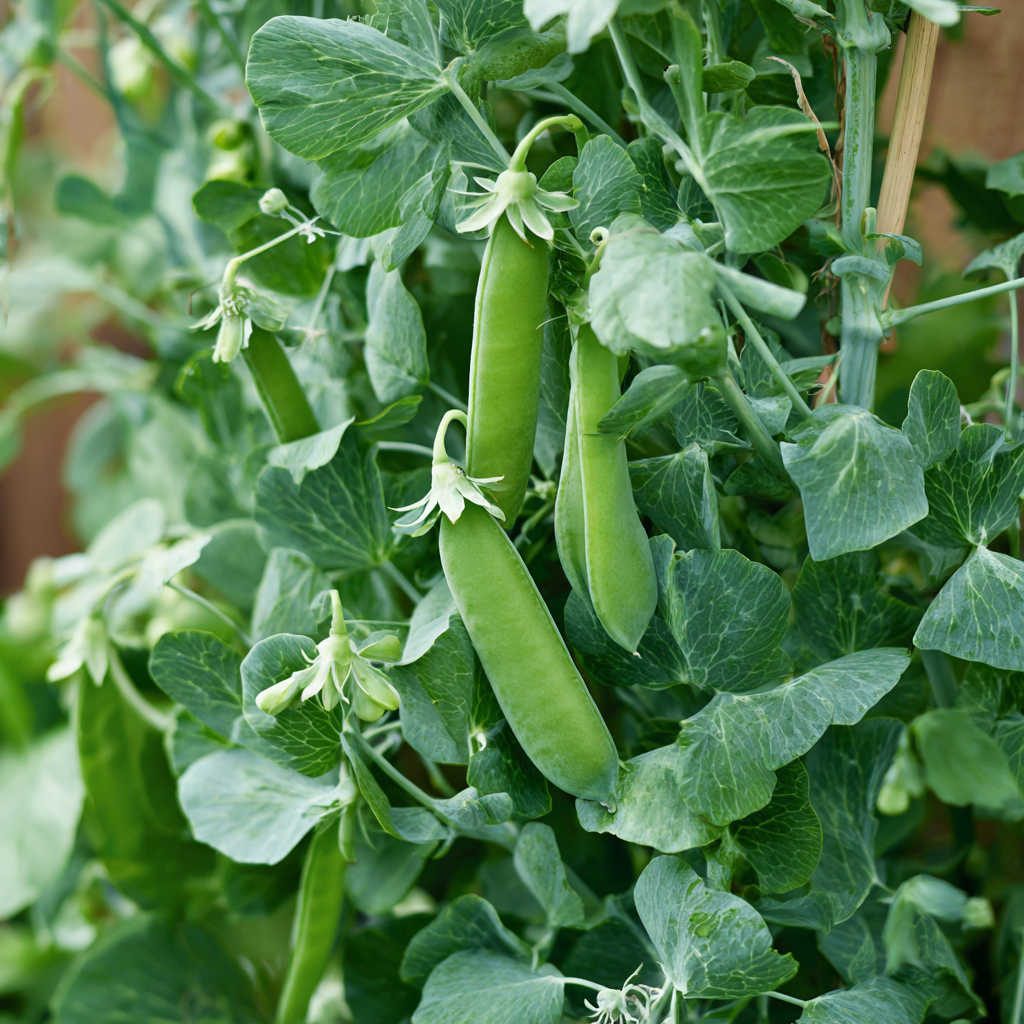
Dwarf Sugar Grey Pea is a compact edible-pod pea – a snow pea type – grown for its flat, tender, stringless pods that are harvested and eaten whole, pod and all, before the peas inside develop fully. What makes this variety immediately recognizable is its flowering: the blossoms are bicolored purple and pink, far more decorative than the white flowers of most garden peas, and the sturdy, bushy vines reach only 12 to 24 inches tall. That short stature means the plants are self-supporting in calm conditions, though a little structure keeps pods cleaner and easier to find. It is a cool-season direct-sow crop with the heirloom character of a long-cultivated kitchen garden staple.
Quick How-to
Sow Dwarf Sugar Grey Pea directly into cool garden soil in early spring, about 1 inch deep, 1 to 2 inches apart in the row. No indoor start is needed or recommended. Germination takes 7 to 14 days in cool soil. Begin harvesting flat pods at about 65 days, when pods are 2 to 3 inches long and the peas inside are just barely visible as small bumps. Harvest daily once the plants start producing: flat pods become tough and fibrous if left past peak.
Quick Guide
| Fact | Recommendation |
|---|---|
| Best method | Direct sow in cool soil; roots are sensitive to transplanting |
| Sowing depth | About 1 inch |
| Germination temperature | 45 to 65 F; tolerates cool conditions well |
| Days to germination | About 7 to 14 days in cool soil |
| Light for germination | Cover seed; no light required underground |
| Spacing | 1 to 2 inches apart in row; rows 18 inches apart |
| Sun | Full sun; light afternoon shade acceptable in hot spells |
| Water | Consistent moisture throughout; critical during pod fill |
| Harvest | About 60 to 65 days for flat edible pods; harvest before peas swell inside |
| Vine height | About 12 to 24 inches; often self-supporting, light support recommended |
Before You Sow
Pick a well-drained bed in full sun. Prepare the soil by loosening the top several inches and removing large clods. Pea roots are sensitive to sitting in saturated soil, so drainage matters more than fertility for this crop. A moderately fertile soil with good tilth is the goal.
As with other peas, an optional but useful step is treating seed with Rhizobium leguminosarum inoculant before sowing, particularly in beds that have not grown peas or beans in recent years. Inoculated seeds form root nodules that fix atmospheric nitrogen, reducing the plant’s dependence on soil fertility. Do not apply heavy nitrogen fertilizer, as it promotes leafy growth and can actually suppress the nodule-forming process.
Direct Sowing
Dwarf Sugar Grey Pea is best direct sown. The roots and lower stem establish most naturally when they are never disturbed. Sow as soon as the soil can be worked in spring, even if light frost is still possible. Its cool-season performance comes from pea physiology and early-season adaptation, not from pod thickness: the harvest-stage pods are intentionally thin, flat, and tender.
Place seed about 1 inch deep, 1 to 2 inches apart in the row. Cover, firm lightly, and water gently. Keep the seedbed evenly moist until seedlings emerge. Avoid overwatering, which can cause germinating seeds to rot; the goal is moist but not waterlogged soil.
In hot-summer climates, a fall planting is also worth considering. Sow 65 to 70 days before the first hard frost so pods mature during cooling fall weather, which often brings out sweetness in peas.
Supporting the Vines
At 12 to 24 inches, Dwarf Sugar Grey Pea is described as a bushy, self-supporting plant. In a calm garden location, many gardeners grow it without any structure. That said, even short pea vines sprawl across each other and onto the soil surface when there is nothing to climb. A few branchy twigs stuck in the row, a short pea net, or a single line of twine a foot off the ground gives the tendrils something to grab and keeps pods off the ground where slugs and rot are more likely.
Soil, Sun, and Water
Soil should drain well and be reasonably loose so roots can develop without obstruction. pH in the 6.0 to 7.0 range is fine for most peas. Peas produce their own nitrogen through root nodules, so fertile soil is an asset but not critical; avoid nitrogen-heavy amendments.
Full sun supports the most vigorous flowering and heaviest pod set. During stretches of warm weather, light afternoon shade can modestly delay heat stress, but peas are a cool-season crop and will naturally decline as summer temperatures climb.
Water evenly throughout the season. The most critical window is when flowers appear and pods are setting. Drought stress during flowering reduces pod count and pod size. Avoid wetting foliage in the evening; damp leaves overnight are a reliable way to encourage powdery mildew.
Top Mistakes
- Waiting too long to harvest: With edible-pod peas, timing is everything. Pods that look right one day become tough and fibrous within 2 to 3 days. Check plants daily once production starts and pick at the flat-pod stage, before peas swell visibly inside.
- Growing without any support in windy spots: In exposed beds, unsupported vines tangle, break, and press pods onto wet soil. Even minimal support prevents most of this.
- Sowing in warm soil: This variety is bred for cool conditions. Sowing into warm soil produces slow, uneven germination and plants that rush to flower before they are well established. Get seed in early.
- Allowing finished plants to stay in the ground: Peas produce for a relatively short window before heat ends the crop. Remove finished plants promptly to free the bed for the next planting and to reduce disease carryover.
Troubleshooting by Symptom
| Symptom | Likely causes | What to do next |
|---|---|---|
| No germination after 14 days | Waterlogged soil, too deep, or soil is still very cold | Check drainage; confirm planting at 1 inch; resow in warmer, better-drained conditions |
| Pods becoming stringy and tough | Harvest delayed past peak; peas developing inside pod | Harvest daily once pods begin to set; pick at the flat-pod stage at 2 to 3 inches long |
| Powdery white patches on leaves | Powdery mildew, very common in late pea season | Improve airflow; water at soil level; harvest remaining pods and remove plants before mildew spreads |
| Few pods despite good flowering | Heat during flowering, dry soil during pod set, or flowers aborting before self-pollination completes | Keep the root zone evenly moist; if sustained heat is the cause, harvest what forms and plan an earlier spring or fall sowing |
| Yellowing lower leaves early in season | Overwatering or poor drainage; or normal light shading of lower leaves by canopy | Confirm drainage; reduce watering frequency; normal lower-leaf decline does not require action |
| Pods with spots or brown patches | Bacterial leaf spot, grey mold, or slug damage near soil | Remove affected pods and leaves; improve airflow; use physical barriers for slugs if present |
Harvesting Dwarf Sugar Grey Pea
Begin harvest at about 60 to 65 days from sowing. Look for flat pods 2 to 3 inches long in which the peas inside are barely visible as small bumps. Those pods are at their most tender and sweet. Snap or cut pods cleanly from the vine with scissors rather than pulling, which can dislodge the vine from its support or uproot shallow roots.
Harvest daily. Unlike a shelling pea where late harvest merely means starchier peas, a snow pea left too long becomes unpleasant to eat whole. The pods are still technically edible if the peas have begun to swell, but they lose the flat, crisp, stringless quality that makes this type worth growing.
Refrigerate pods promptly and use within 2 to 3 days. Dwarf Sugar Grey Pea pods are good raw in salads, briefly stir-fried, or lightly steamed.
Seed Saving
Peas are self-pollinating, and crosses between varieties in a home garden are relatively uncommon. For seed saving, allow selected pods to dry completely on the vine until they rattle when shaken. Pull the whole plant, hang upside down in a dry, ventilated location, and let finish drying before shelling. Store seeds in a cool, dry, sealed container and label with variety and year.
Storing Leftover Seed
Keep unused Dwarf Sugar Grey Pea seed in its labeled packet inside a sealed container in a cool, dry, dark indoor location. Avoid garages, sheds, greenhouses, and sunny windowsills, where temperature and humidity swing sharply. Label home-saved seed with the variety and harvest year before storing it.
FAQ
What makes Dwarf Sugar Grey Pea different from Alaska Pea?
These are fundamentally different crops. Alaska Pea is a shelling pea: the pods are tough, and you shell out the smooth round peas inside to eat. Dwarf Sugar Grey Pea is an edible-pod snow pea: you harvest and eat the entire flat pod, ideally before the peas inside develop. The plants also look different in the garden: Dwarf Sugar Grey has striking bicolor purple flowers and a bushy, compact habit; Alaska has white flowers and a slightly taller vine.
Are the purple flowers edible?
Pea flowers of any variety are generally considered edible and have been used in salads. However, individual sensitivities vary, and the primary use of this variety is the edible pod. Do not confuse Pisum sativum with sweet peas (Lathyrus odoratus), which are ornamental and toxic.
Can Dwarf Sugar Grey Pea grow in containers?
Yes. The compact size makes it a practical container crop in a pot at least 10 to 12 inches deep and wide. Fill with well-draining mix, provide light support inside the container, and water consistently, as containers dry out faster than ground beds.
Should I shell the pods or eat them whole?
Eat them whole, pod and all, at the flat snow-pea stage. That is the defining feature of this pea type. If you want peas to shell, a shelling pea variety like Alaska Pea is the right choice.