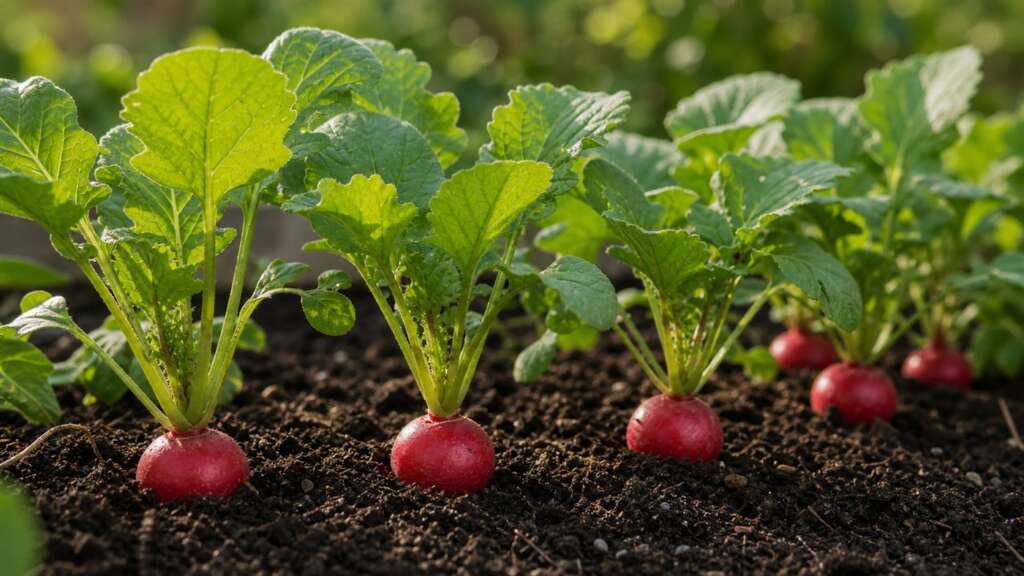
Champion Radish is a classic round, red, salad-type radish grown for fast, crisp roots with mild bite. Like most spring radishes, it does its best work in cool weather, when steady moisture and a loose seedbed let the roots size up before the plant decides to bolt. It is one of the most forgiving crops for a first-time gardener and one of the most rewarding for a busy one, because it goes from seed to harvest in roughly the time it takes other vegetables to germinate.
Quick How-to
Direct sow Champion Radish into prepared soil in early spring as soon as the ground can be worked, and again in late summer or early fall for a second crop. Cover seed about 1/4 to 1/2 inch deep, firm gently for soil contact, and keep the surface evenly moist until sprouts appear in roughly 3 to 7 days. Thin promptly to about 1 to 2 inches apart so each root has space to swell, and pull roots as soon as they reach usable size to keep them sweet and crisp.
Quick Guide
| Fact | Recommendation |
|---|---|
| Best method | Direct sow; do not transplant for normal harvest |
| Sowing depth | About 1/4 to 1/2 inch |
| Germination temperature | About 45 to 75 F; cool to mild soil is ideal |
| Days to germination | About 3 to 7 days |
| Light for germination | Cover seed lightly; light is not required to sprout |
| Spacing | Thin seedlings to about 1 to 2 inches apart |
| Sun | Full sun in cool weather; partial afternoon shade if the season is warming |
| Water | Keep evenly moist; avoid dry-wet swings that split roots |
| Harvest timing | Often about 25 to 30 days from sowing; verify final packet timing |
| Plant size | Small leafy tops with quick-forming round red roots |
Before You Sow
Radishes are fast, which is mostly good news and occasionally a teacher. Because the whole cycle is short, mistakes show up within a week or two rather than at the end of summer. The fix is to set the seedbed up well and to sow modest amounts often, rather than planting one big row and hoping.
Choose a sunny spot with loose, well-drained soil. Rake the surface smooth and break up any clods, especially in the top inch where the root will form. Heavy clay and rocky beds can produce twisted or forked roots even when everything else is right. Working in a little finished compost helps texture, but skip heavy nitrogen feeding before sowing radishes; rich nitrogen pushes leafy tops at the expense of round roots.
Water the bed lightly before sowing if it is dry. Pre-moistened soil holds tiny seed in place and gives sprouts a steady start rather than a parched one.
Direct Sowing
Open a shallow furrow about 1/4 to 1/2 inch deep. Drop seed every inch or so along the row, cover with fine soil, and press gently with the back of a rake or your palm so seed makes firm contact with damp soil. Water with a gentle spray so seed is not washed into one corner of the row.
Keep the top layer of soil consistently moist until you see sprouts. If the surface crusts after a hard rain or aggressive watering, tiny seedlings can struggle to break through; loosen any crust gently with your fingers or a fine rake.
Sow small successions every 1 to 2 weeks while the weather stays cool. A short row every week or so produces a steady supply of tender radishes instead of a single overwhelming flush that turns pithy in the bed.
Indoor Starting and Transplanting
Indoor starting is not a useful method for standard salad radishes like Champion. Radishes form their crop underground in a single short burst, and transplant disturbance is one of the easiest ways to produce forked, stunted, or bolting plants. Sow directly where the roots will mature, and use any extra seedlings you pull during thinning as a mild salad green.
Thinning
Thinning is the step most home gardeners skip, and skipping it is the most common reason for “leaves but no roots.” Once seedlings have their first true leaves, thin to about 1 to 2 inches apart. It feels wasteful at first, but each plant needs room for its root to expand. Crowded radishes simply will not bulb properly; they grow tall thin tops and pencil-thin roots no matter how patiently you wait.
Thinning is easiest when the soil is slightly damp. Pinch or snip extras at the soil line rather than pulling, which can disturb the roots of neighbors you want to keep.
Soil, Sun, and Water
Champion Radish wants full sun while the weather is cool. Once temperatures climb, a little afternoon shade can help slow bolting and protect texture. Loose, well-drained soil produces the cleanest, most uniform roots; compacted or stony soil tends to twist them.
Even moisture is the single most important variable after spacing. The goal is a seedbed that feels like a wrung-out sponge, not standing wet and not dust dry. Big swings from dry soil to heavy watering are the main trigger for split or cracked roots, because a parched radish drinks fast when water finally arrives and the skin cannot keep up with sudden internal pressure.
Mulching lightly between rows once seedlings are established helps hold moisture and keep soil cool as the season warms.
Top Mistakes
- Sowing too thickly: It is easy to drop more seed than you mean to. Seedlings come up shoulder to shoulder, and even careful thinning later cannot fully recover the missed root development. Sow thinly, then thin again.
- Skipping thinning: Healthy-looking seedlings still need space. If leaves are touching, roots are already competing.
- Sowing into heat: Radishes perform best in cool to mild conditions. Hot soil and long warm days can cause uneven germination, small woody roots, and early bolting before roots ever size up.
- Letting soil swing dry and wet: Cracked and split roots almost always trace back to inconsistent watering. Steady moisture beats heavy occasional soaks.
- Harvesting late: Radishes do not wait. Once they reach size, every extra day in the ground risks pithy texture and hot, bitter flavor. Pull on time, even if the row is not all ready at once.
Troubleshooting by Symptom
| Symptom | Likely causes | What to do next |
|---|---|---|
| Lots of leaves but no real roots | Crowded seedlings, excess nitrogen in the soil, or warm weather pushing top growth | Thin promptly to 1 to 2 inches, skip nitrogen feeding, and sow during cooler windows |
| No sprouts after about 7 days | Surface crusted over, seedbed dried out, seed buried too deep, or soil too cold | Gently loosen any crust, keep the surface evenly moist, and resow at 1/4 to 1/2 inch if needed |
| Roots are pithy or hollow inside | Harvested too late, heat stress, or drought during sizing | Harvest younger, keep moisture steady, and shift the next sowing to a cooler window |
| Roots are cracked or split | Irregular watering, especially a heavy soak after a dry stretch | Water more often and more lightly so soil moisture stays steady through sizing |
| Roots are forked or twisted | Stony or compacted soil, debris in the seedbed, or transplant disturbance | Loosen the top several inches before sowing, remove stones, and direct sow rather than transplant |
| Plants flower before roots size up (bolting) | Heat, long days, or seedlings stressed by drought and crowding | Sow earlier in spring or later for fall, keep moisture even, and thin on time |
| Hot, bitter flavor | Heat, dry soil, or roots left in the ground too long | Pull at usable size, water consistently, and avoid summer sowings |
Germination Diagnostics
If a row is slow to come up, work through the seed environment in order rather than changing everything at once. Start with depth: a quick scrape of the soil with your finger usually tells you whether seed is at the right level or buried too far down. Next, check temperature. Radish seed germinates across a wide range, but very cold spring soil or hot summer soil can both slow or scatter emergence.
Moisture is the next checkpoint. Press a finger into the top half inch of the row. It should feel cool and damp; if it feels dusty, the row needs a gentle watering. A crusted surface after heavy rain is its own problem; tiny radish sprouts have very little muscle and can stall under a hard cap of dried soil. Break up any crust lightly with a fork or your hand.
Finally, consider age. Radish seed stores well, but very old or heat-damaged seed can sprout unevenly. A quick paper-towel test with a small sample tells you whether the seed itself is the issue before you write off the whole bed.
Timing and Climate Notes
Treat Champion Radish as a cool-window crop. Sow in early spring as soon as soil can be worked, continue with small successions while weather stays mild, then pause when summer settles in and pick up again for a fall crop. Fall plantings often produce some of the best-textured radishes of the year because nights cool down as the roots are sizing up.
In warm climates, the cool window may run through fall, winter, and into early spring rather than the typical northern spring-and-fall pattern. The plant cares about temperature, not the calendar.
Container and Small-Space Notes
Radishes are an excellent container crop because they are shallow rooted and quick. A pot at least 6 inches deep with drainage holes is enough for round red types like Champion. Use a light, well-drained potting mix and keep it evenly moist; container soil dries faster than ground soil, especially in sun and breeze.
Sow thinly and thin to spacing just as you would in a row. A wide, shallow tub planted in a grid pattern works beautifully on a balcony or porch in spring and fall.
Harvest and Use
Begin checking roots about three weeks after sowing by gently brushing back soil at the base of a plant. Champion Radish is typically ready when roots are about one inch across, give or take, but final size depends on packet specifics and conditions. Pull roots as they reach usable size rather than waiting for the whole row at once; harvesting in waves keeps the bed productive and protects flavor.
Trim tops shortly after pulling so the leaves do not pull moisture from the roots in storage. Rinse, dry, and refrigerate in a sealed container or bag for up to about a week. The greens are also edible when young and tender, useful in salads, stir-fries, or quick sautés.
Seed Saving
Saving seed from radishes takes longer than growing them. The plant must be left in the ground past harvest stage, allowed to bolt, flower, and form long seed pods that eventually dry on the plant. Because radishes cross-pollinate readily with other radish varieties and even with some wild relatives, saved seed may not come true to type if other radishes are flowering nearby.
If you want to try it, leave several of your best plants in place, let them flower, and harvest pods once they are dry and brittle. Thresh out the seed, dry it thoroughly indoors, and label by variety and year.
Seed Viability and Storage
A practical planning range for radish seed is about 4 to 5 years when stored cool, dry, dark, and sealed. Older seed often still sprouts but may germinate unevenly. If your seed has been through a hot garage summer or a humid storage spot, run a small paper-towel germination test before relying on it for the main planting.
FAQ
Why did I get plenty of leaves but no real radishes?
Almost always crowding, heat, or excess nitrogen. Thin to about 1 to 2 inches as soon as true leaves appear, skip nitrogen feeding before sowing, and aim for cool-window sowings rather than midsummer.
How often should I sow Champion Radish?
Small successions every 1 to 2 weeks during cool weather give a steady supply rather than one overwhelming flush. Pause sowings during the hottest stretch of summer and resume for fall.
Can radishes grow in containers?
Yes, and they do well there. Use a container at least 6 inches deep with drainage, sow thinly, and keep the mix evenly moist since container surfaces dry quickly.
Why are my radishes hot or pithy?
Usually heat or late harvest. Once roots reach size, every extra day risks woody texture and sharper flavor. Pull on time and shift sowings earlier or later to avoid the hottest weeks.
Do I need to thin if I sowed carefully?
Almost always yes. Even careful sowing produces some clumps, and radishes simply will not bulb properly shoulder to shoulder. Thinning is the single highest-leverage step in growing good radishes.